Post Production – HDR and Digital Blending

St Mary's of Lastingham

Having had such a busy week, I am only now getting round to processing my images from last week and our long weekend in the Yorkshire Dales. A fantastic long weekend, but it being a biking trip the photography was limited.

During our exploring I made it a goal to visit a number of waterfalls. With the heavy rain earlier in the week the rivers were full and that meant the waterfalls were in full flow.

Without a tripod I was limited but I still tried to use long shutter speeds. I also bracketed extensively, as I was intending to HDR the images like the one above taken earlier in the year.

As I was going to HDR the images I set the camera to aperture priority. You want the aperture to stay fixed while the shutter speed changes, having the depth of field change will ruin your HDR image.

Recently I have been looking at a number of HDR images on line by other top photographers, and they often have a far better, more realistic quality then mine. In an effort to get a more real quality I have now started to combine HDR with digital blending techniques.

With the camera set for auto bracketing I fired off a number of shots then chose the above two, to combine for the HDR image. I then imported one of the orginal images and the produced HDR image into photoshop as two layers. I then, where I thought was necessary masked the HDR image to bring some of the qualities of the original file back.

The end result is still not realistic but still, for a HDR image I like it.

Watch out for the end of the month shot, I feel I will be using this technique again to produce my Photo of the Month! I’ll try my best to use digital blending to make it more realistic but with a hint of HDR.

Hotel Wireless – Free for some, paid for others

Sorry for the lack of posts recently, after last weeks long weekend, it was followed by a hard week at work.

At the start of this week I had to pop down to London for a couple of days.  I was travelling light, but still took the iPad.  I fully intended to write a few blog posts but came across a very iritating but common issue.

Often during the day I came across free WiFi.  Even at the hotel there was free WiFi in the bar, but at the end of the day after I had retired to my room to write up my notes for the day and update my blog, the internet access in my room was paid only.

I could walk in off the street, have a drink in the bar and use free WiFi, but as a paying customer who had booked a room for the night, who wanted to use the internet in his room, I had to pay extra for the privilege.

Not fair.  So here instead of my usual update you get a quick rant instead.  Sorry guys!

SnapSeed for the iPad

I love our iPad, and more and more Photography focused apps keep appearing.

SnapSeed is a app recently updated with RAW support, which is what attracted me to it.  If your away with just your camera equipment and your iPad sometimes you want to play with your images and test out your ideas.

I shoot RAW and until now there has been a lack of applications for the iPad that support the camera manufactures RAW formats.  Until now with the updated SnapSeed from Nik software.

Nik are a big player in photography processing, products like Silver Efex Pro, produce the best black and white conversion I have found.

This is not a review and not a recommendation, but it is a fun app.  The image above was initially processed in Lightroom then during my lunch break last week I had my first real play with the application and produced this.

Have not had time to test the RAW support, according to their website RAW files are supported when Apple’s camera connection kit is used.

To keep the weight down on our motorcycle road trip we took, once SLR, two lens and an iPad.

The photo in the previous post was taken on my iPhone then processed on my iPad while I was on my road trip.

Road Trip – all good things come to an end

Well a fantastic four days travelling round North Yorkshire.

20110721-085320.jpg

The weather on day one and four was challenging and dramatic, possibly the second worse rain storm I have ever ridden in, thanks to a great bike and good clothes we got through it and even enjoyed it.

The middle two days were spent generally riding round and site seeing. We went on a bit of a waterfall hunt. With the rain they were in full flow and a truly dramatic sight. We even found the waterfall from that scene in “Robin Hood Prince of Thieves”‘ where Marion is watching him bathe.

It was a hot afternoon, and it was tempting to jump in, but instead I just photographed the scene.

Road Trip

When I look back, the last 14 months have been rather boring on the motorcycling front.

Last May 2010, we travelled round the coast of Great Britain on a motorcycle, visiting new places and making new friends.

Since then only the normal commute, and a few day trips.

Well this is certainly not good enough, so on Friday we packed our bags, well panniers, and this Saturday morning set off on a long weekends motorcycling road trip.

The weather was certainly against us, and as I had a new front tyre fitted on Friday, the ride was more careful then spirited.

Friday was a beautiful day, I collected the BMW R1200GS from our local garage, after having a new front tyre fitted and had a fun ride home.

Saturday morning found us loading the panniers in the poring rain.

20110716-111724.jpg

Once all packed we slowly travelled up the east coast of England, utilising the Humber Bridge to speed us on our way.

The rain was terrible, it’s been a while since I had ridden in such heavy rain, and I had forgotten to ensure the Goretex liner of my jacket was correctly over my gloves.

At the first stop after the Humber Bridge, I found my hands wet, from the water running off my jacket into my Goretex water proof gloves. A lesson on dressing correctly in this bad weather.

Just after lunch as we reached Scarborough, the sky slowly turned blue, the warm dry wind, slowly dried out our jackets. Caroline took the opportunity to change gloves, we had brought a spare pair to change into should it be required.

Once at Scarborough we headed west, and as usual stopped in Thirsk for a snack and a rather fine hot chocolate.

We continued west and found a rather pleasant Bed & Breakfast in the North Yorkshire Dales.
Now as I type this, well rested after a meal and bottle of wine in the local George & Dragon I look forward to what tomorrow might bring.

Portrait Post Production with Adobe Lightroom and Photoshop Part 5 – A review

You have now seen some of the techniques I use in portrait post production.  Which one is best?

Well thats difficult to say,  It really depends on whats needed and whats acceptable.

Above you have the uncorrected RAW, Basic adjustments from Lightroom, Skin Blur and Digital Make-up.  Which one is best i’ll leave to you.

Hope you enjoyed these techniques.  Coming soon, posts on Work Flow and also Sharpness.


Special thanks go to Shelley GiardCorey Barker and Kelby Training, thanks guys, these techniques have been stolen shamelessly from you. Thanks for making me a better photographer.


Want to learn photoshop and learn about these techniques in more detail, then check out the Podcast “The Photoshop Guys” and also the websiteKelby Training, well worth subscribing to.

Portrait Post Production with Adobe Lightroom and Photoshop Part 4

In Parts One and Three we covered the use of the use of the healing brush.  Now its time for skin smoothing.  In Part Two we used the most controversial technique, skin blurring.

Now were going to use what could be termed digital make up.

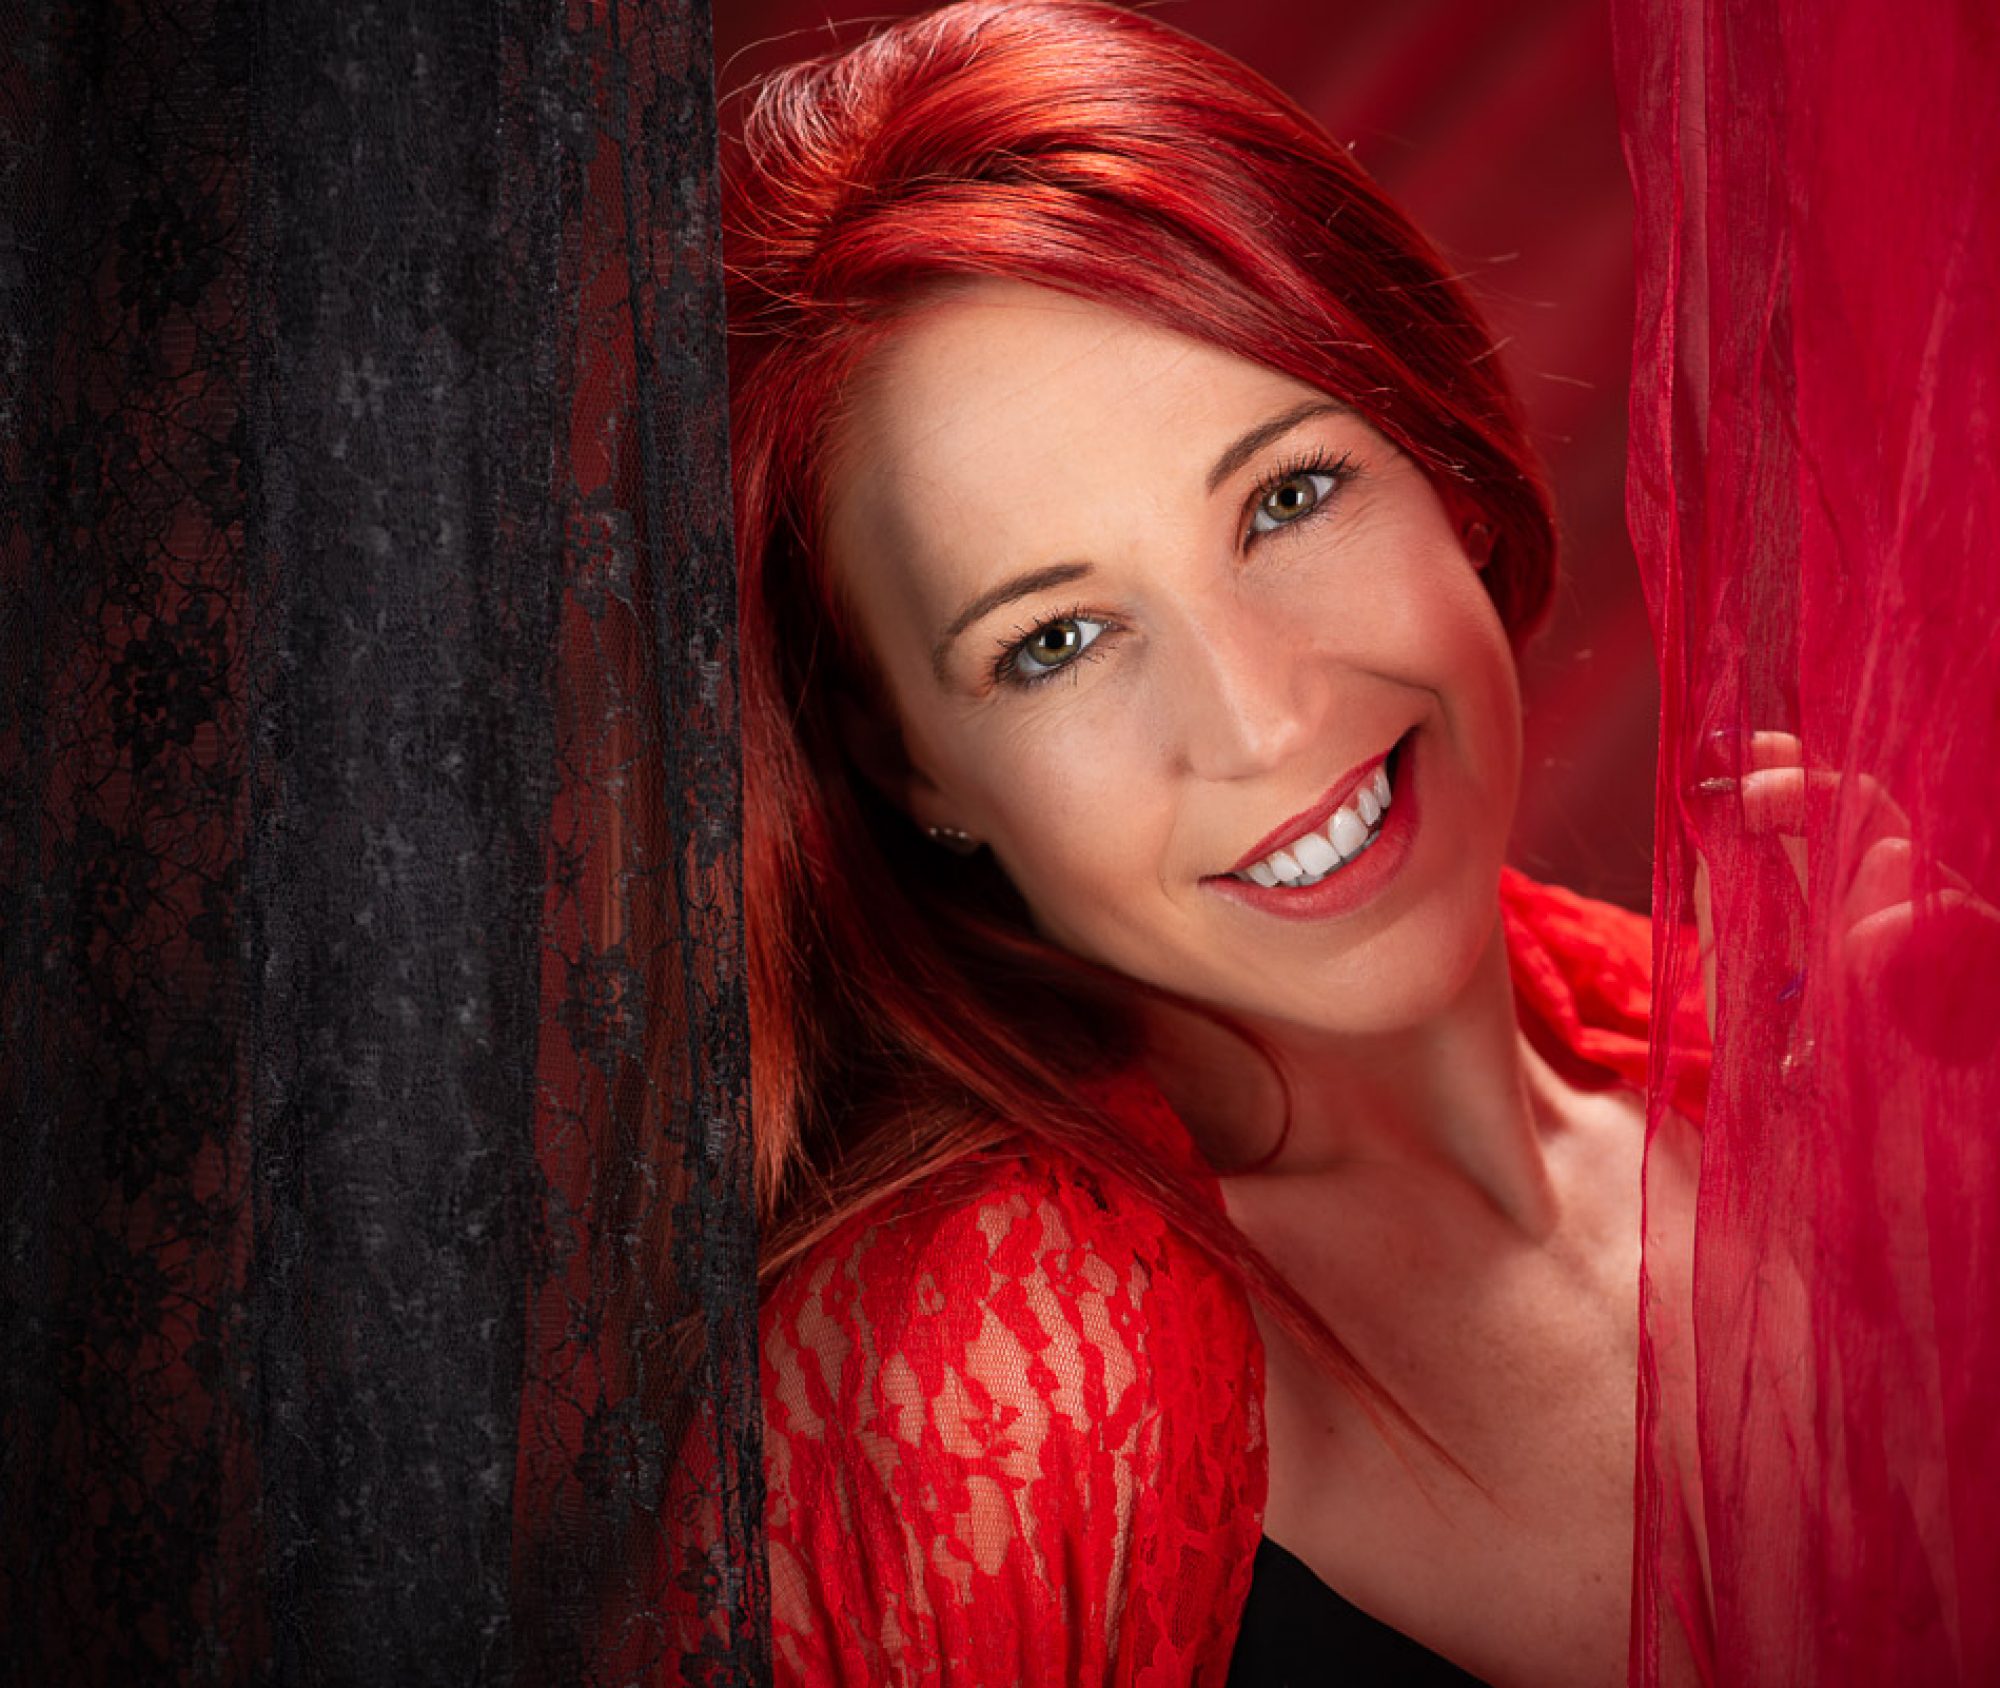
From our Part 3 post we  had ended up with the image above.  The major imperfections have been corrected (see Part Three) now its time for the skin blur.

Using photoshop duplicate the layer (Command-J on the Mac), don’t work on the original layer.  If you have multiple layers all contributing to the final image then use Shift-Option-Command-E (On the Mac) to produce a new layer based on the previous layers.

Our first job is to create a layer mask based on the cleanest channel of the image.

If you deselect all channels except one and view the image in turn you will soon see which channel is the cleanest.  Normally its the Red Channel.

With just the cleanest channel selected, Command-Click (Control-Click in Windows) on it to produce a selection. Click back onto the layers tab and click on the create new layer, then click on Add Mask.  A mask based on the channel selection will be created.

Make sure you have the new blank layer selected before you start.  Select a small soft brush.  The intention is to layer on a colour that will mask the skins imperfection, just like a layer of make up.  If you have a tablet then this is far easier but it can be accomplished with a mouse or a Mac touch pad or Magic track pad.  Just set the flow to a low setting between 1-10 no higher.

Using option click sample a good skin tone and then paint this on.  Keep sampling and painting.  On the new layer you will end up with something like this:

This overlaid produces a very pleasing image retaining texture in the skin tones.

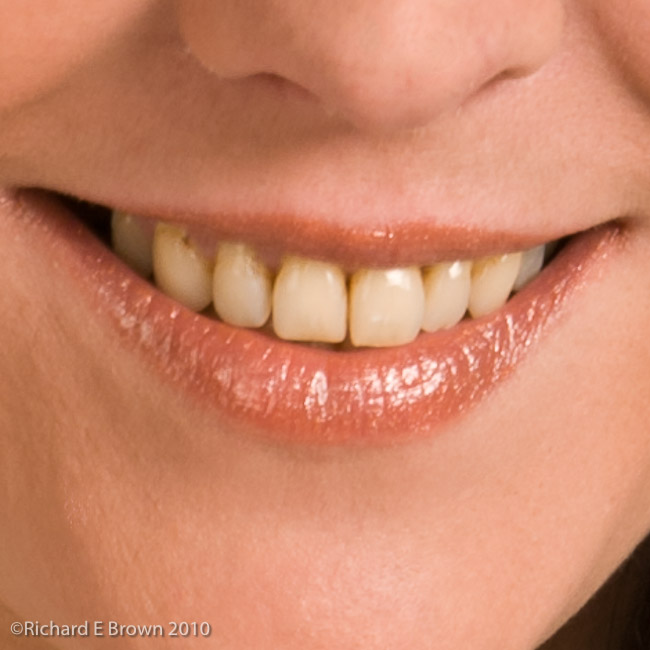
As I mentioned in Post 3, you could now go on to work on the eyes and teeth but the basic work is complete. Once you have it looking like you want its just time to add the sharpening and final tweaks.


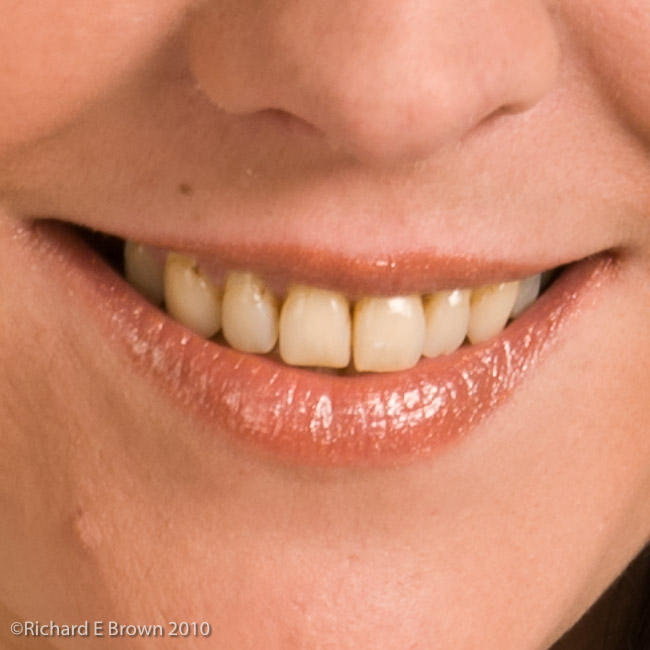
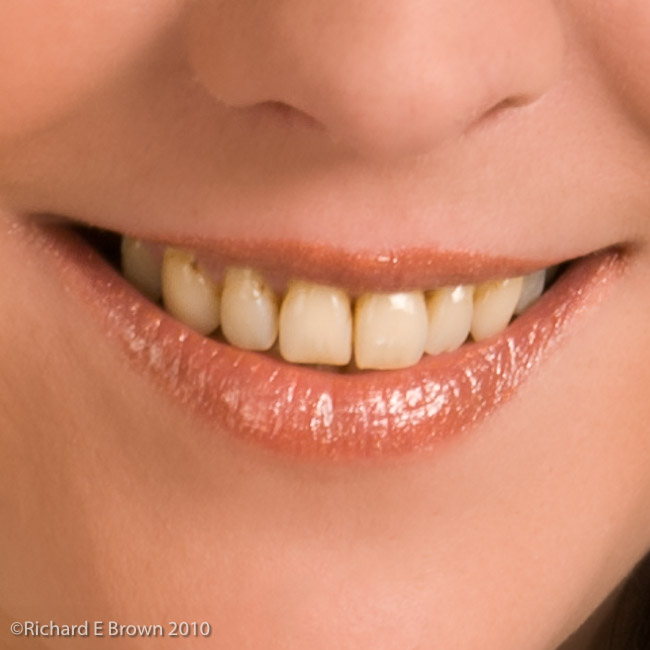
Below, is a crop of the before, a crop of the after using the blur technique from part 2 and a crop of the digital make up technique used here.


Special thanks go to Scott Kelby and Kelby Training, thanks guys, these techniques have been stolen shamelessly from you. Thanks for making me a better photographer.


Special thanks go to Shelley GiardCorey Barker and Kelby Training, thanks guys, these techniques have been stolen shamelessly from you. Thanks for making me a better photographer.


Want to learn photoshop and learn about these techniques in more detail, then check out the Podcast “The Photoshop Guys” and also the websiteKelby Training, well worth subscribing to.


Portrait Post Production with Adobe Lightroom and Photoshop Part 3 – Retaining Texture

Back in Part One and Part Two of this series, we processed a RAW image, made some basic adjustments and ended up with the following image.

Then we took it into Photoshop, cleared up the complexion and applied skin softening techniques using the skin blurring techniques.

In this part we will again take the image into Photoshop but this time try our best to retain the original skin texture leaving a more natural look.  This technique requires more effort but for gives better results.

Using photoshop duplicate the layer (Command-J on the Mac), don’t work on the original layer (I am going to keep repeating this, its easier to delete a layer and start again on that stage then to have to start from scratch).

In the above image using the spot healing brush with the mode set to Lighten but with content aware switched on (CS5 not available in previous versions) the major imperfections in the skin have been removed.  Use a small brush, just bigger then the spot your trying to heal and remember to use a soft edged brush.  Dab a away on the darker imperfections gradually removing them.  For the lighter areas and excessive skin shine, the same technique can be employed but set your Mode to Darken.

If your working on an area close to a boundary like an area of skin next to the hair or the dress, it can make the image look worse.  If this happens just undo and switch from the spot healing brush to the healing brush.  Select from an adjacent area (Option-Click on Mac; Alt-Click on Windows), and then click on the area to heal.  For larger areas, then you will need to resort to patch tool, but be careful to prevent reoccurring pattens from forming.

Next we will soften the skin but this time use a more advanced technique to preserve the texture.  See you in Part Four.

Special thanks go to Shelley GiardCorey Barker and Kelby Training, thanks guys, these techniques have been stolen shamelessly from you. Thanks for making me a better photographer.


Want to learn photoshop and learn about these techniques in more detail, then check out the Podcast “The Photoshop Guys” and also the websiteKelby Training, well worth subscribing to.


Portrait Post Production with Adobe Lightroom and Photoshop Part 2

Well we did the initial corrections and used the healing brush.  Now its time for skin smoothing and the most controversial technique, skin blurring.

Most people now say don’t use it, but used carefully it can produce a very nice effect.

I still use it for many of my images, while it can destroy texture, its fast and can produce images that your client will love.

If you remember from our part 1 post, we had ended up with the image above.  The major imperfections have been corrected (see Part One) now its time for the skin blur.

Using photoshop duplicate the layer (Command-J on the Mac), don’t work on the original layer.  If you have multiple layers all contributing to the final image then use Shift-Option-Command-E (On the Mac) to produce a new layer based on the previous layers.

From the menu select filter-blur-Gaussian Blur.  I tend to use a Radius of 20 pixels but feel free to experiement.

What you see above is the blur effect, now obviously this is totally unsuitable, so add a layer mask via Option-(add layer mask button).  This masks out the effect of the blur and you get back with what you had before you added the blur.

Now you select the layer mask and carefully paint on the mask to remove it where the skin is.  Once that is complete reduce the Opacity to about 40% on the layer and you will have a reasonable effect.

You could now go on to work on the eyes and teeth but the basic work is complete. Once you have it looking like you want its just time to add the sharpening and final tweaks.

Part 3 will see us going back to the beginning, this time we will use techniques to try and preserve the original skin texture.

Before and after below:

Special thanks go to Scott Kelby and Kelby Training, thanks guys, these techniques have been stolen shamelessly from you. Thanks for making me a better photographer.


Want to learn photoshop and learn about these techniques in more detail, then check out the Podcast “The Photoshop Guys” and also the website Kelby Training, well worth subscribing to.