Its certainly been wet here in Lincolnshire. We have been lucky apart from a few flooded roads we seem to have gotten away lightly compared to some areas.
Its situations like this where having a camera with you can be a good idea. Unfortunately not all cameras are weather sealed and some are more prone to failure then other.
So if your out photographing this week in this bad weather, take care of your gear.
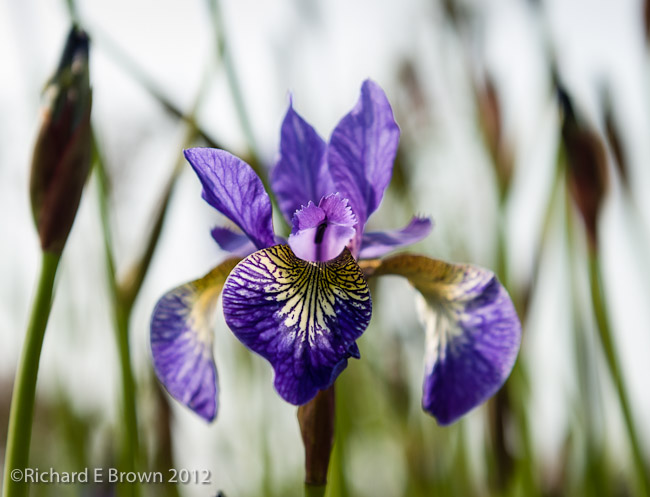
I may have blogged in the past about always shooting in RAW. Here is a rather poor example which I like anyway.
Back in the film days we developed our films in our favourite chemistry. Once developed that was it. Now with digital we have the option of shooting RAW and when new software is developed we can go back to our old files and ‘re-develop’ using the latest RAW developer.
The above shot was a snap of an easter event happening in Lincoln, It was poor light, shooting into the sun. The orginal RAW developer did not make much of it but this week, I was exporting images again for my off site backups and this caught my eye. I decided to re-process using the latest Adobe Lightroom V4. Its now much better then the original.
Final Image with input, creative and output sharpening for screen
I always thought sharpening was a relatively straightforward process, but I have seen some rather heated discussions on forums, people confusing input sharpening, output sharpening and of course creative sharpening.
No Sharpening
As mentioned above people generally divide sharpening into either two or three stages:
Import Sharpening (also known as Capture Sharpening):
The aim of this is to restore the sharpness to the image that is lost during the image capture.
Creative Sharpening
This is selective sharpening added to key parts of the image, such as the eyes in a portrait.
Output Sharpening
Different media require different levels of sharpening. Sharpen an image for best results for a computer screen and it will look poor and soft on a small print. Sharpen for a small print and it will look awful and gritty on the screen. Different sizes of print will also need different levels of sharpening. Sharpen so it looks good on a 8.5 x 11 inches and it will not look right on a print 13 x 19 inches.
No Sharpening
Why do we need to sharpen? A digital image is of course a pixelated image. Adjacent pixels may be the same but they may be very different. The camera tends to average out adjacent pixels that are very different in order to reduce the amount of apparent pixelation.
What sharpening does is increase the amount of edge contrast, basically it lightens the light side of the edge and darkens the dark side. Good sharpening software will only do this on the luminance values of the data and not affect the colour information.
There is not one set of rules that you can use for sharpening, different images need different settings. All I can advise is that you shoot RAW, don’t let your camera choose the sharpening level, and use a good third party sharpening tool. For import sharpening the best two are Adobe Lightroom and Camera RAW which is built into Photoshop (actually they are the same underline code and RAW development engine).
Creatively Sharpen
Creative sharpening can be used to highlight key areas. In the above shot import sharpening has been applied but also in the post production a reduction in mid tone contrast which has the result in softening the image slightly, this was done even more heavily on the skin town to make the skin look softer. The eyes, lips and hair then had there mid tone contrast increased and those areas selectively sharpened.
High Output Sharpen
Finally, output sharpening, this adds the sharpening needed to suite the output media, above I used a relatively high for screen setting. If the output was for print it would have to go even higher and would look decidedly crusty on-screen.
One of the huge advantages with digital is that we can leave most of our filters at home and when we are safely back at home or at the office we can apply the effects we want in post processing.
Put there are a number of filters we should consider as still essential for digital work.
Polariser
Graduated Filter (but you can use HDR and digital blending)
So the other day I listed some of my iOS apps I use on my iPhone or iPad to help me in my photography but what do I use them for.
My favourite is SnapSeed from Nik software, available for both the iPhone and the iPad, its a great app for messing about, and trying out ideas. More for the iPad then the iPhone, its key feature for me is that it can process RAW files not just jpegs.
My most useful app is probably gps4cam. This is truly an amazing little app. Your turn it on at the start of your photography session then at the end you click on the stop and take a picture of the QR code displayed. When you process copy your photographs to your computer you then run the desktop client against your photographs including the photography of the QR code, and the software adds the gps co-ordinates into each photograph. No need to match clock times or the usual hassles that other types of gps software need, its effortless.
If your a studio user and have Elinchrom lights and the wireless sky port system then try the free Elinchrom SkyPort WiFi app. This allows you to remote control all your studio lights direct from your iPad.
Lastly if your an Adobe Lightroom user, and you use your iPad to backup your photographs when out on site, try PhotoSmith. This allows you to add all your keyword and metadata information to your photographs and then sync them and this data to your Lightroom database once your home, a great little time saver.
When shooting Landscapes on Small Format, I expect my technique is similar to most SLR users.
Modern Digital SLR’s have great dynamic range and we snap away generally trusting in our modern matrix metering.
A quick glance at my histogram is usually enough to see if my exposure is in the ball park. I tend to follow the digital mantra ‘Expose to the Right’, but I try not to over expose or clip.
Unlike film, digital at the extremes of the black and white points is a cliff face. There is nothing below 0 and nothing after 255 in our binary capture world.
I know the recovery slider in Adobe camera RAW and Lightroom can bring back a surprising amount of detail, but this is detail held in your capture, your not really recovering anything.
When my exposure looks bad it’s here I either reach for the Exposure Compensation Button (I usually shoot in Aperture Priority). In really tricky situations I use my camera’s spot meter.
If the dynamic range of the subject exceeds my camera’s dynamic range, then I generally bracket my exposures. Once back home I then resort to HDR or digital blending, sometimes both. Products like Photomatix Pro and of course Photoshop make HDR very easy now.
Getting it right in Camera is always the holy grail, to this you have to resort to careful metering.
Sekonic L 758 Light Meter
If using my medium format camera, then this would be with my handheld spot meter. I actually start with an incident meter reading first, this usually puts me in the ball park. With the meter in its incident mode, you place it in the same light as the subject you want to photography, and point the metering dome at your camera and take your reading.
I usually have my meter set to EV readings. My Hasselblad has markings for EV and an EV lock, so I can set the exposure then adjust my aperture and the shutter speed will automatically change to maintain my set EV reading.
This incident reading is my starting point. I then try to determine the dynamic range of the scene. First of all I try to find the brightest part in the scene, once found I set this in the memory of my meter. I then try to find the darkest part of the scene. Once again this gets set in the memory of my meter. I then hit the averaging button and note the average. This is usually close to the incident reading if the dynamic range is now too high.
With the meter in averaging mode, you can then meter around the scene with the spot meter, and it will display the how many EV’s above or below the average that part of the scene is. You can then ensure the important parts of the scene is exposed correctly and will maintain detail in your photograph.
With my meter, it has a clever trick in averaging mode. It displays a graph at the bottom showing your lowest and highest reading, together with the average. Now that is not the clever part, the clever part is that I can upload from my computer custom Dynamic profiles for different cameras, films, and for each iso. So on the meter you can select your camera or film and the meter will show if your exceeding the dynamic range available, and you can then adjust your exposure as needed.
If you are exceeding the dynamic range then the choice is to allow what you want to go back/white. With your meter you can easily determine what that will be and make an informed choice.
Often at this point I will often bring out the filters. A one to two stop gray graduated filter usually drops the dynamic range by enough to resolve your issues.
In many respects I am quite old fashioned in my photography. I believe in using the right tool for the job.
Though I also believe any camera you have with you can produce a master piece.
When it comes to Landscapes the bigger your film or digital sensor the better, though one should also remember that depth of field reduces as sensor/film size increases.
So while I have taken great Landscape images with my iPhone, I feel my best work has been done with Medium Format or Large Format.
Surprisingly I feel this has less to do with image quality and more to do with thinking more about the shot.
Having to set up my tripod, camera, choose the right back, lens, filters, and then spend time time metering the scene to work out the dynamic range and exposure really focuses the mind and makes one concentrate on a great composition.
I’ll talk about the basics of metering in my next post.
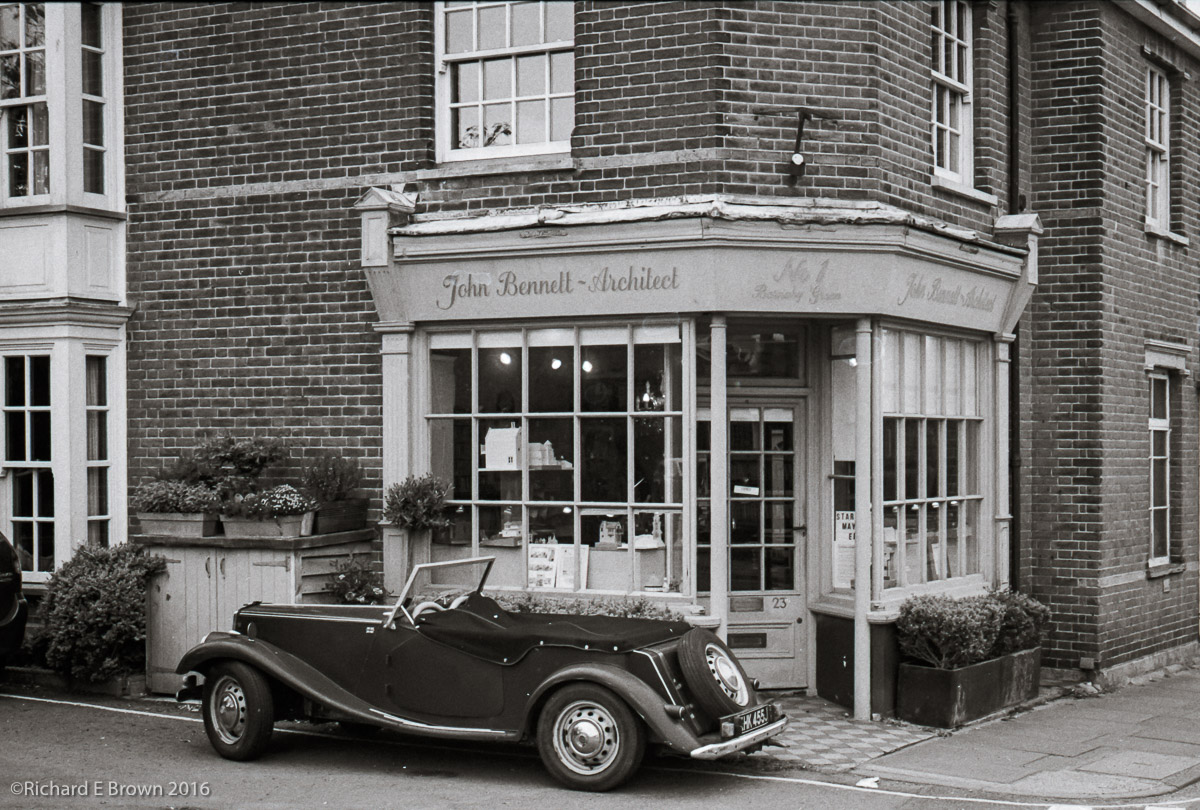
I get to visit Lincoln, Lincolnshire in England nearly every day. They say familiarity breeds contempt, and I sometimes forget what a beautiful city Lincoln is.
Today I went up steep hill and went round the more touristy areas of Lincoln. With a mix of lovely independent shops and the Castle and nearly one thousand year old Cathedral it has some wonderful photogenic areas.
Try going round your own neighbourhood with fresh eyes you may find a picture or two worthwhile.