
The iPad (or insert your favourite Android, Palm WebOS tablet OS here), are consumption devices and toys not suitable for real work is what you are always told.
Well to be honest they’re not suited for Photography heavy lifting but its surprising what you can accomplish.
I went out with a small Billingham Hadley Bag carrying an iPad, Leica M8, spare memory cards, camera batteries a couple of lens for a walk while the rest of my Photo gear was safe in the hotel.
I took photographs of the pretty little church, a few other buildings and a few people who looked interesting.
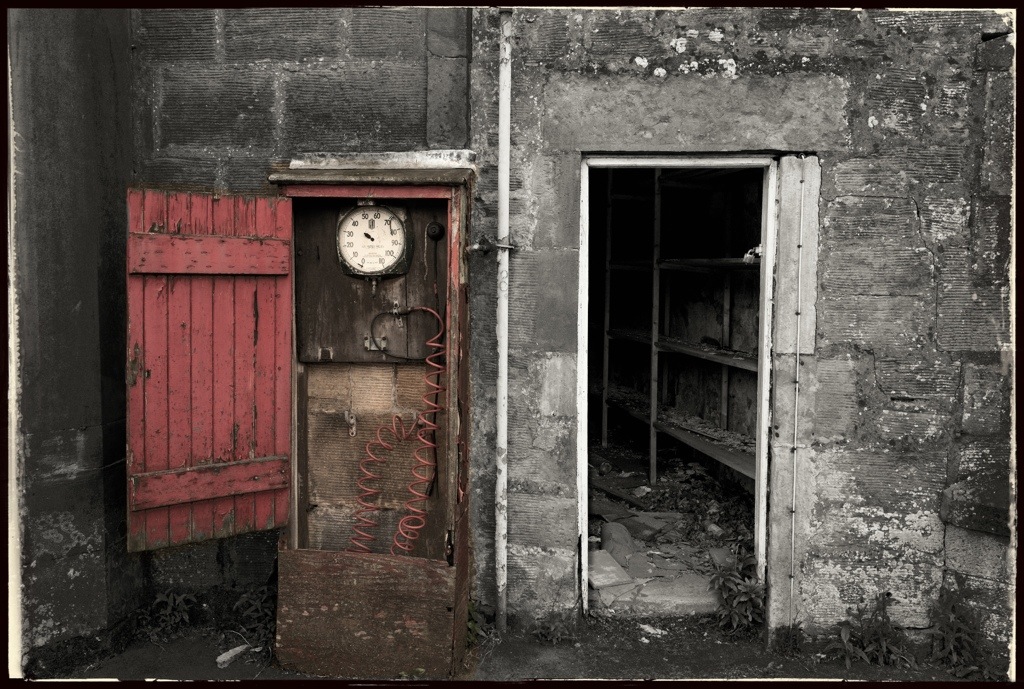
We then passed a rather small old garage that had stood unused for a number of years so I had to take a few shots.
After a meal we were relaxing and I decided to see what I could do with a few of the images. I have a iPad2 and using the camera connection I imported all my photographs, I usually make a backup of my photographs at the end of the day like this when I do not have a computer to hand. This then gives me two copies, one on the memory card and one on the iPad, once back home I always ensure I have three separate copied before wiping the cards.
Once on my iPad my first job was to use my PhotoSmith App to create a collection holding today’s Photographs, then I added location meta data and keyword’ed them. This App can then sync this information over to my master Lightroom Catalogue. I then used my new Raw processing software PhotoRaw. I loaded a few images and created a few full sized jpegs with a few tweaks.
The photograph of the garage was one I most interested in. I thought as a desaturated imaged leaving a little red in the imaged but removing the rest would work well. The kind of work I wanted to do really needed the HSL model of Adobe’s Lightroom but what can you do on an iPad?
With the garage image in PhotoRaw I had the import sharpening set to Auto, I have tested a few of the manual sharpening import options and there is even a setting for my Leica but Auto seems to produce the same settings as the Leica setting and seems to give the best results.
I gave the image a slight contrast boost, lifted the shadows and warmed and desaturated the image very slightly. I then saved it as a full sized jpeg and opened the image in Photoshop Touch. A quick selection of the coloured area to place it on its own layer, I could then turn the other layer into a Black & White image. Another layer containing the inside view enabled me to brighten that area. Once again it was saved and then opened in SnapSeed, where I warmed the image and added the frame. And so there you have it. An imaged processed from the Raw and the published on the web, all using my iPad. Even this post was written and published using it.
One Reply to “iPad Photo Editing in the field”