Synchro Daylight or Fill in Flash

No work today, but I did want to do some experimentation with Synchro Daylight.  An old term but basically its when you mix flash and daylight together.  Most people have heard it described as fill in flash, it can also be used with great affect when the flash is the primary source and the sun as the fill-in.

Its something I have used in the past to great affect, and modern hot-shoe electronic flashguns to make it very easy.  But I wanted to have a play around with manual, and trying out the balance flash functionality in my light meter.

Sekonic L 758 Light Meter

I bought the L-758 for its spot meter feature when shooting medium and large format.  But it also has some advance flash features and can show the balance of daylight to flash.

So equipped with a Nikon D200, a Nikkor 24-70mm f/2.8 and a SB-800 flashgun I ventured outdoors with my flash meter and volunteer model for the day, my very patient wife Caroline.

First a simple portrait with daylight, manual mode.  Easy.  Then the flash set to manual at relatively low power.  The light-meter held by my wife under her chin with the de-fusion dome pointing at the flash gun.

After several attempts and varying the flash power, the meter was only reading the flash component.

I had to commit the ultimate male sin, find the manual and give it a quick read.  Unlike previous meter’s I had set it to the Flash-C, but this actually meant Flash with a cord, not Flash and Continuous light.  The mode that had just the Flash symbol turned out to measure both flash and continuous light.

With the light meter now in the correct mode we tried again, varying the exposure and flash output and reading the balance of daylight to flash from the meter and comparing that to the results seeing what we liked.

It certainly makes judging your exposure when mixing flash and daylight easier and I hope to put it into good practice with a summer beach photo shoot I intend planning.  I just need to find a location, a suitable model and a bit of good weather.

Heres looking forward to summer.

Daylight and Fill in Flash – Model in the summer house

Happy New Year – and the end of an era

Happy New Year Everyone

The end of an era.

As many Photographers already know the great film Kodachrome was discontinued in 2009.  While manufacture ended, there were still a few places left where you could get it developed.

The last has been Dwayne’s Photo in Kansas.  This has been the last lab in the world that was able to process the film.

Well today is the end of an era.

Dwayne Steinle the owner, will today have the last every roll processed.

With no more places left to process the film today is the end.

I shot a few rolls of Kodachrome 25 myself back in the 1980’s, but my allegiances switched to that young upstart Fuji Velva 50.  It is a sad day.  With so few film sales now, not many films can survive but I am glad to see film has seen a bit of a revival this year.

Even I have shot more film this year then in the past six.  Most of it being Medium format and some Large Format, but I only shot one roll of 35mm.

I think we may see the end of the 35mm film, but medium and large format still seems to be going strong and sales even increasing.  Lets hope it continues.  I still feel there is a place for film in this very digital world we live.

Flash – Studio Lighting

Flash!

No not Adobe’s flash, I am not getting into that argument.  I have an Apple iPhone and I fully accept its a better phone for not having flash, but then I am also a flash user and on my professional website I use flash for my photographic galleries!

No this post is about Photographic lighting.

Most photographers are used to the typical hot shoe flash.  The hot shoe flash is quite the modern electronic marvel.  I have a pair of Nikon SB-800’s and they are great.  Full TTL control; if you are scared of flash then just set them and your camera to full auto, and with appropriate flash head positioning you can get great results.

The key is not to use the flash in the camera’s hot shoe but use them off camera.  For fill in flash and the odd party I use hot shoe flash with great success.

For studio work, I always use professional mono-block mains powered studio lights.  That, with a good soft box produces results that are hard to beat any other way.

I usually hire a local studio with Elinchrom RX lights, and find I get good results far easier then with small hot shoe flashes.

Many photographers are intimidated by studio lighting.  It seems hard work.  The camera has to be set to manual.  You have to use a flash meter to calculate your exposure.  Then there are all the complicated accessories, softboxes, brollies, snoots, barn doors and honeycomb grids, to name just a few, to modify the light.

I have now started to think about getting some studio flash myself.  The very high end stuff is out of the question, far too expensive for the few times each month I would use it.  But it needs to be of good quality, robust for travel, have stable colour temperature and high speed flash duration to freeze action.

In the UK that leaves you with just Bowen’s and Elinchrom.  If your in the USA then Elinchrom and brands such as Alien Bee’s are popular.

I have spent quite some time now researching the brands and am still no nearer choosing what I want.

Bowen’s lower end models work with battery packs, so are easy to use away from mains power, there are a large array of accessories available, and you get good reports about customer service.  They are also a UK brand, and even the lower end models are very well built.

Elinchrom are what I am used to.  The Rotolux softboxes are the best, and the skyport remote system is excellent.  Most Pro’s I know use Elinchrom.

Once the brand is picked, where do you enter the system, go for the bottom of the range, cheap but will they take the abuse of travel.

I have to admit, after a lot of research, all I have managed to do is confuse myself more, and I am still none the wiser.

Checking out the forums has not helped, its nearly as bad as the Nikon and Canon arguments.

Any advice gratefully received.

Planning my January Model Shoots

A quite day at home for us today.  We had decided to have the day off to extend our Christmas holiday.

The morning was spent contacting a few local models.  I am currently planning a location shoot to test a few new ideas for the new year.  The location is now all set so I just had to book a model.  I was wanting to try someone new so I contacted a few local models using some of the popular modeling forums.  I was soon sorted so now everything is booked.

Over the next couple of weeks I will finalise my ideas and make copious notes.  You really want a good plan for when your doing a shoot.  The location, sets, clothes, make-up and poses all ready and written down.

This does not mean you cannot use spontaneity during a shoot, but have a good plan before you start.  There are to many things that could go wrong, or you could get side tracked, forgetting what your trying to achieve and end up coming away with nothing.

For this particular shoot, the customer is just me.  The intention is to test out a few ideas and to test out a new location.  If it all goes wrong theres only myself that will get upset.

When its a paying customer you must plan everything out, have a full shot list and backup plans.

Even though the shoot is just for me and only a test, I will still treat it as if it was a normal paid shoot and plan accordingly.

A Modelling Photographic ‘Night Before Christmas’

Twas the night before Christmas when all through the site

Not a creature was stirring and noone to fight.

The pictures were posted on profiles with care,

In hopes that the bookings soon would be there.

The togs were nestled all snug in their beds

While visions of TF danced in their heads.

And models in their underwear, some even nude,

Were posting new pictures, some rather rude.

When out on the forum there arose such a clatter,

I sprang from my bed to see what was the matter.

Away to my computer I flew like a flash,

Opened the browser and refreshed the cache.

The posting was new and fresh on the thread,

And what I was reading filled me with dread.

With fear that cut to the depths of my soul,

I saw a new message from the internet troll.

“Now chaperone, now no-show, now GWC!

On part paid, full paid and TFCD!

Canon and Nikon and some other kind

Are you a perv or are you just blind?”

As replies filled the site with meaningless junk,

The mods came online and got in a funk.

The threads were locked, the defences were manned,

And before I could post, the troll he was banned.

He sprang to his keyboard and went to reply,

and they drove him away before he could try.

But I heard him exclaim, as he logged off the site,

“Bah Humbug to all, and to all a bad night”

Thanks to Sean for posting this.

Lunar Eclipse

This morning was a luna eclipse, this one being a little more special then most as it was the first in 400 years to occur on the winter solstice.

Heres the luna eclipse I photographed back in 2007.

This provides a good photographic challenge, all thats needed is a long lens, a typical consumer 70-300mm telephoto zoom will do the job.

Metering for exposure can be difficult, the moon is brighter then you might expect, that together with the black sky will trick you meter into the wrong exposure.  Use manual and your histogram to judge, shoot in RAW if you can not jpeg, and use a good tripod.

You will find you need to adjust the composition regularly as the moon moves quite quickly across the frame.

See bbc.co.uk for more details about the eclipse.

Update:

Chris Bennet managed to get some photos of this mornings elipse, you can see them here.

Hoar Frost

Another bitterly cold day, the ride to work was -8°C, I don’t even want to think what the wind chill factor was.

It was a foggy ride in, but as the fog cleared it revealed a beautiful view of hoar frost encrusted trees illuminated in golden sunlight from the low winter sun.

With days like this I wish I had more time for photography.  I always seem to book indoor studio shoots during great photography weather and if I am on location the weather is awful.  Thats fate I suppose!

Hands on with the Sony NEX-5

Well today I finally got my hands on the Sony NEX-5.  This is not going to be a review, I am sure you have read many already, just a few first impressions.

The big advantage of the Sony is the size of its sensor, as its APS-C, its the largest sensor yet fitted to an EVIL camera.  Yet its the smallest interchangeable large sensor compact yet released.

I have to admit, it does look odd with the oversized 18-55mm lens it comes with, but it does feel surprisingly good in the hand.  The ergonomics are surprisingly good, and I was certainly expecting worse.  While not as pocketable as a ‘normal’ small sensor compact, it would certainly fit in a large jacket pocket.

With the size of the sensor, I would hope a few nice wide angles soon appear.  This is an area where Sony potentially have an advantage over micro four thirds, but currently the lens selection is limited compared to the micro four thirds system.

The controls were reasonable and certainly much better then I expected from reading other reviews.

Sony NX-5
©Andrew Jordan

The biggest issue I find is the lack of a true viewfinder.  I want a camera with a proper viewfinder, so once again the camera that still leads the pack for me is the Panasonic GF-1, as at least it has an optional EVF.

Chris Bennett has recently purchased the two lens NEX-5 kit, and I am sure a a true review will be appearing soon on his photography blog.

As you can see the quality is easily as good as any of the current DSLR’s.

Large Format Course

Saturday was my introduction to large format photography.

The one day Intensive Large Format Landscape Workshops are a great way to get a taste of what Large Format Photography is all about.  Dav and Tim are great tutors.

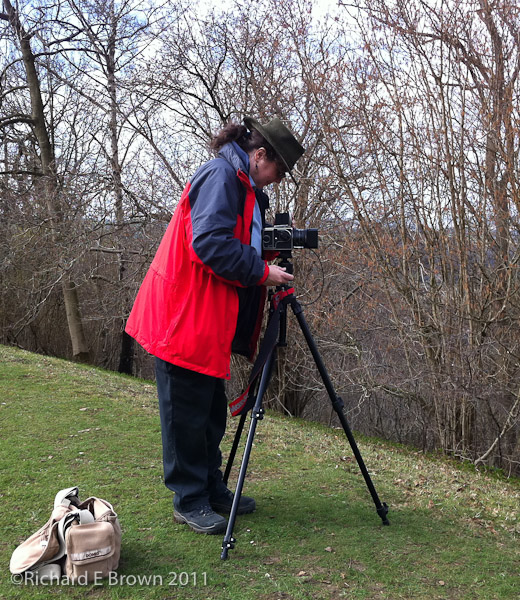
Taken with my iPhone.

The course gives you the chance to get your hands on a large format camera and have a go for real.  Tim and Dav do their best to explain the somewhat complex ideas around Tilts & Shifts, but its the demonstrations and being able to try it for yourself that brings the theory to life.

The downsides of large format photography are generally the sheer size of the camera’s and the amount of time and effort it takes to set up a shot.  This slow and deliberate nature of photography is something that I like, and have got used to when using my medium format Hasselblad camera. Others may also consider the fact that most large format photography is still done with film a major downside, but the cost of digital large format is out of the question for the majority of people, and large format film is hard to beat.

The big advantage of large format photography is the range of movements available.  If you are from a small format (35mm) background this is possibly a big mystery unless you have used a tilt and shift lens.

I certainly know, that for my landscape photography, large format is tempting.  For the price of a modern Nikor Tilt and Shift lens I can buy a complete large format outfit.

A full explanation of camera movements would fill a book, and some university photography courses take an entire term (semester) to explain them.

Basically the advantages of movements are as follows:

  • Apparently infinite depth of field without resorting to closing down the aperture.
  • Correct perspective when photographing buildings, ie no converging verticals.
  • Removing the camera from the image when photographing a mirror.

Tilt is one of the key effects that landscape photographers utilise to produce apparently huge amounts of depth of field.  The effect is known as the Scheimflug Effect.  It was discovered in 19th Century by Theodor Scheimflug.

While it can be hard to explain, once you have seen it demonstrated and have tried it for yourself  you start to understand it.

Tim and Dav first explained the basic workings of the camera, and then with the aid of sketches, how movements work.  It was then a practical demonstration, so you could see the effect yourself.  Then it was time to have a go.  At first just focusing the camera was a challenge, and the temptation was to use too much tilt, but after a while I got the hang of it, and it all began to come together.

With the basics understood, we then had a walk round Robin Hoods Bay taking a few shots, trying to use the movements available to our advantage.

The other part I found a struggle at first, was using the spot meter.  Taking readings round the scene to determine the dynamic range, from that selecting an appropriate film to try and match the dynamic range or using filters to control the scene and bring it back to the dynamic range of the film.

All in all, a very worthwhile day and I look forward to putting some of my new skills into practice with my small format and medium format photography.

Thanks Tim, Thanks Dav, a great day and i’ll try to put some of the things I have learnt into practice.