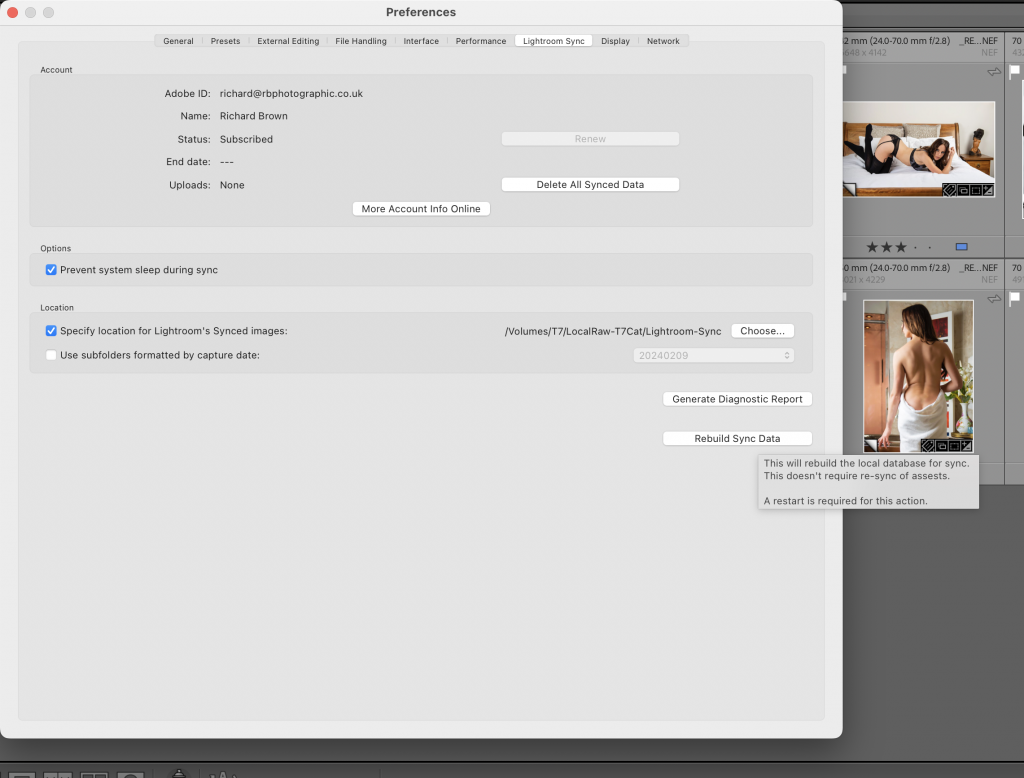
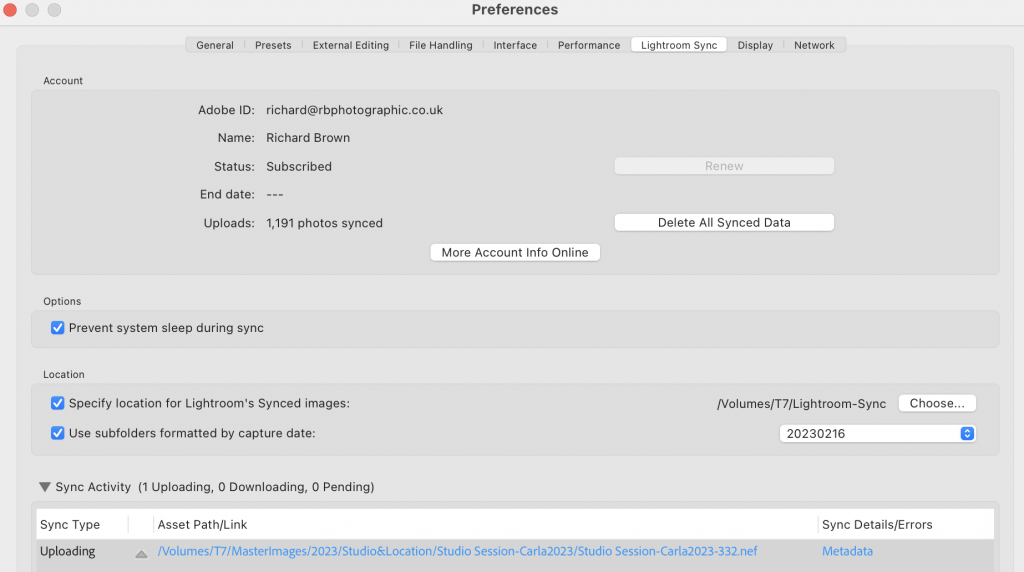
As you can see above, I have blogged about this before and normally just going into to here, then relaunching Lightroom Classic is enough to fix it, but not today.
Luckily there is a hidden button to fix this.
If your on a Mac while in preferences and Lightroom Sync, hold down the Option Key (Alt on Windows) and a Rebuild Sync Data button appears, click on this and your Lightroom will restart and sync will be back working again.
When shooting film it took a lot of experience and skill with a light meter, to understand what the reading meant and how it would look in the in the final image.
Now with digital we get instant feed back. We can get it close with a light meter and then tweak by eye.
Slowly building the image light by light and seeing the results instantly.
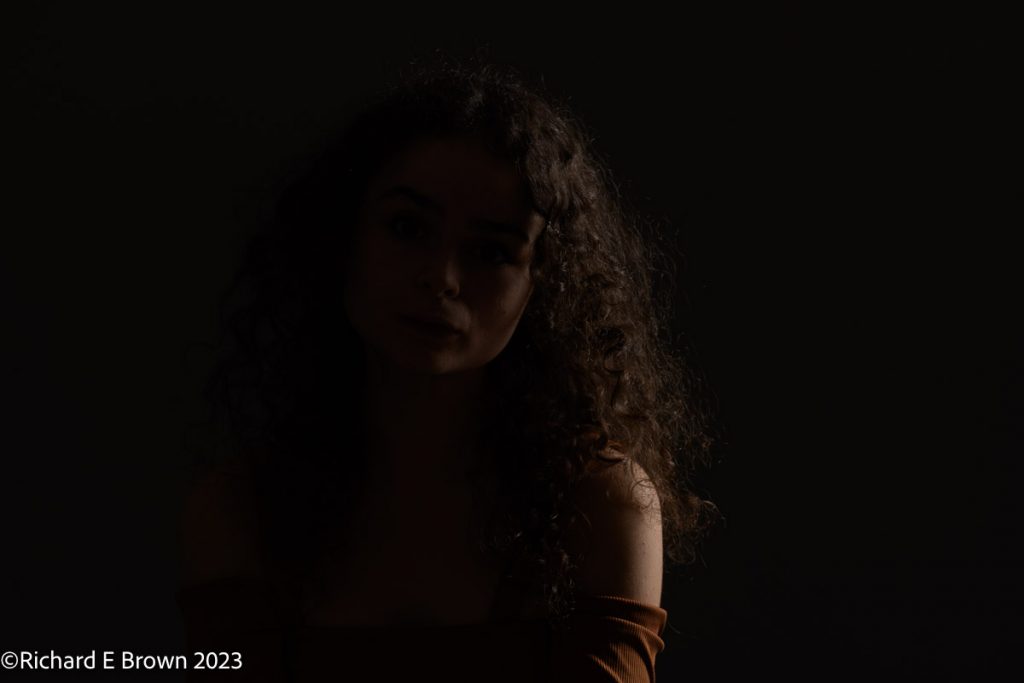
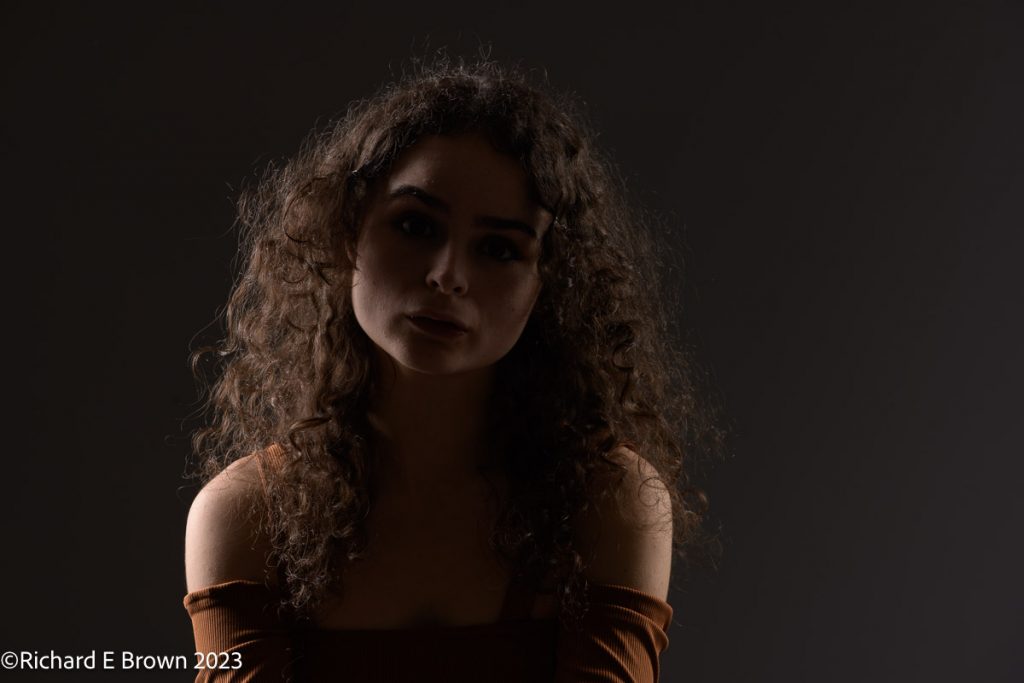
Here we have me building the scene starting with the separation lights, first the stage left, then right and then both together. Finally bringing it all together to create the stunning image at the top.
With all modern cameras now being so good, having instant feed back, we can hone are skills quickly and easily and produce lovely photographs so much easier then in the past.
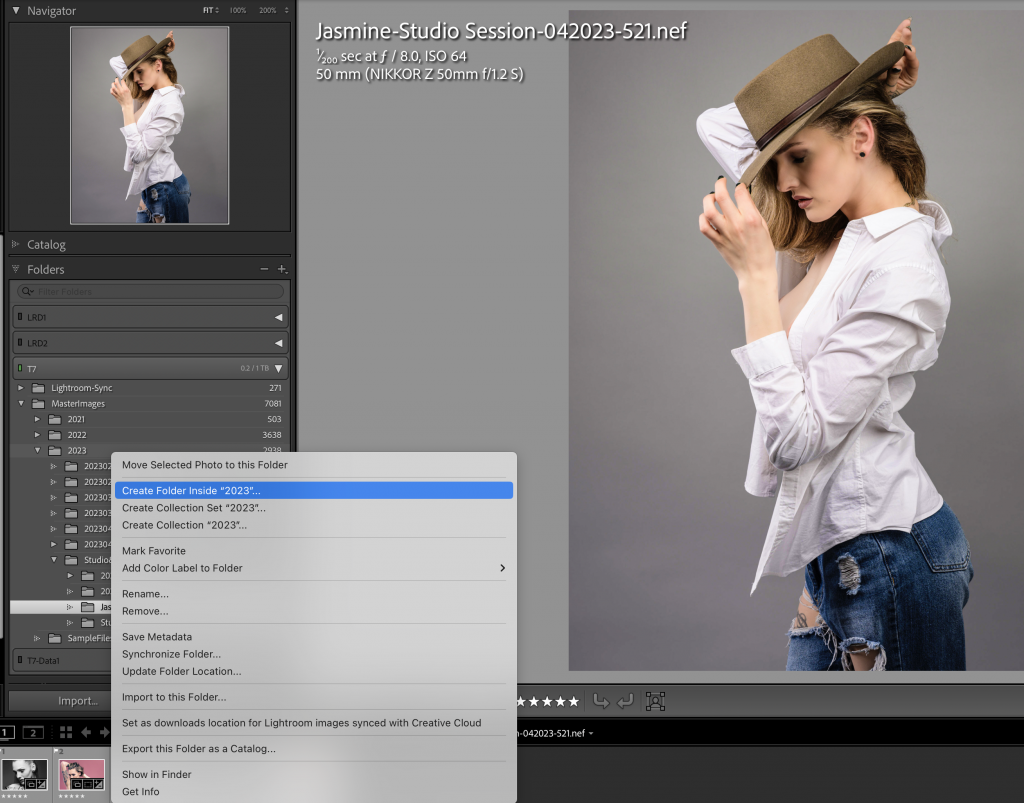
Lightroom import dialogue box can be confusing, there are two options, simple and advance. I have on occasion gotten my import wrong myself, generally importing files to the wrong location but its an easy fix.bad credit loans uk direct lenders
I can think of a couple of other ways of importing photographs but rarely use them. Recently on YouTube I saw this and thought it was a easy way to import if you struggle with the other methods.
The video shows you how but basically create a folder in Lightroom where you want the files to go and then when highlighting that folder select import to this folder.
Simple and easy.
I still use the normal import methods, I have presents that apply things like basic develop settings and metadata which is the advantage of the normal import methods. Creating import, development and location presets to get a lot of the leg work done in advance can really speed up your work flow.
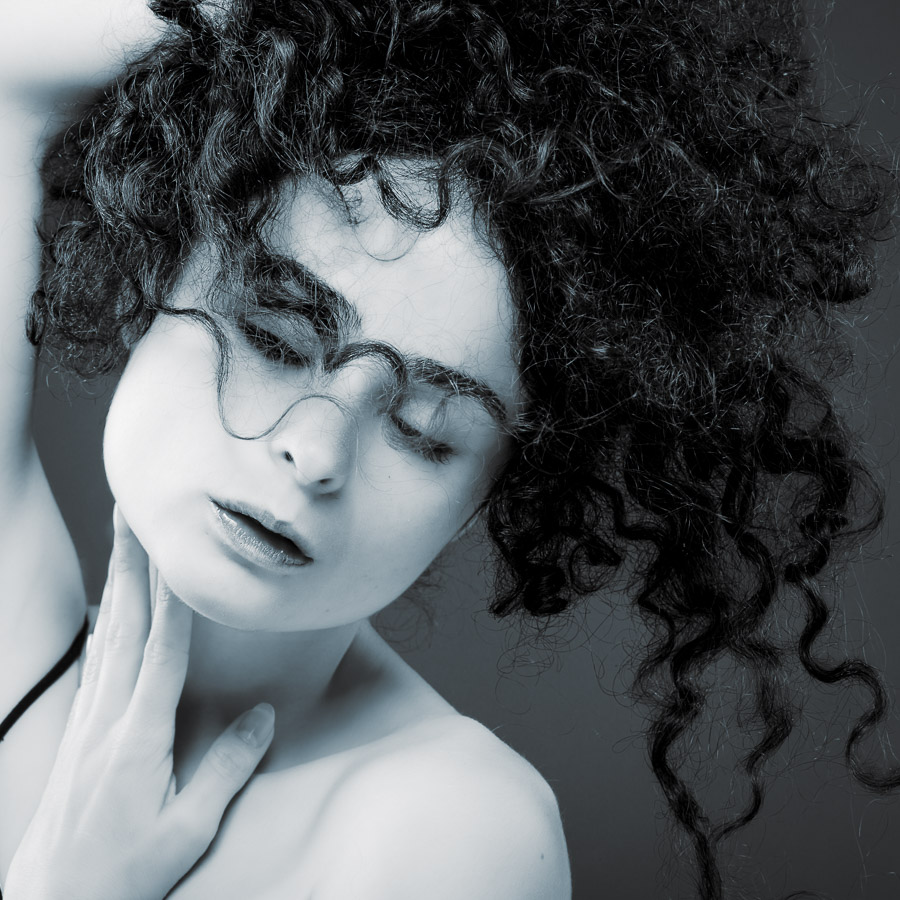
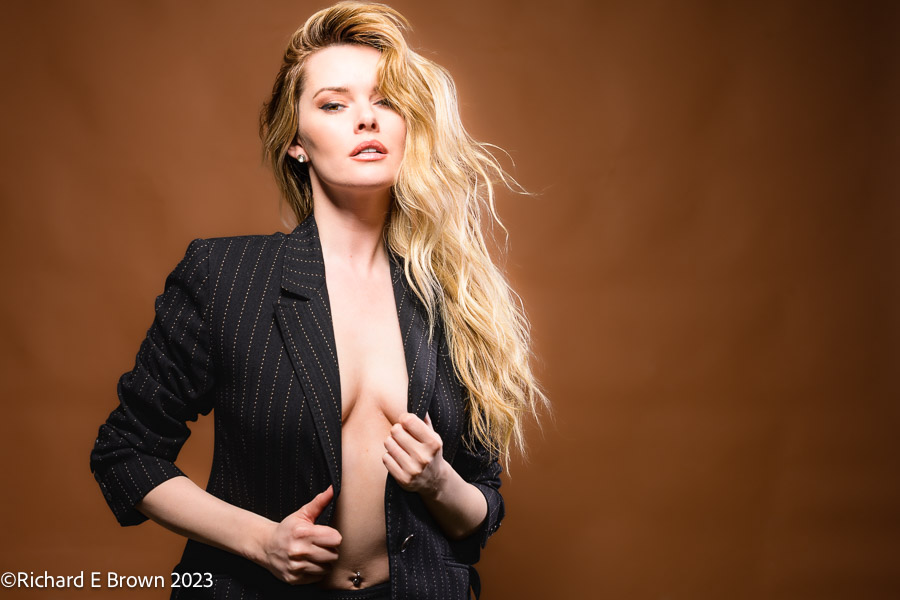
Breaking out the soft box is what most people do in the studio, the larger the better.
If your after that soft romantic feel it is hard to beat. Sometimes though a harder light source can provide a more interesting light.
Here is a hard light shot with a little fill from a soft box and a hair light. The hard light from the beauty dish really sculpts the face. Many photographers would be but off with the shadow under the neck but this can be controlled with a soft box or reflector underneath. Sometimes a very large brolly on axis can also be used to control the shadows well.
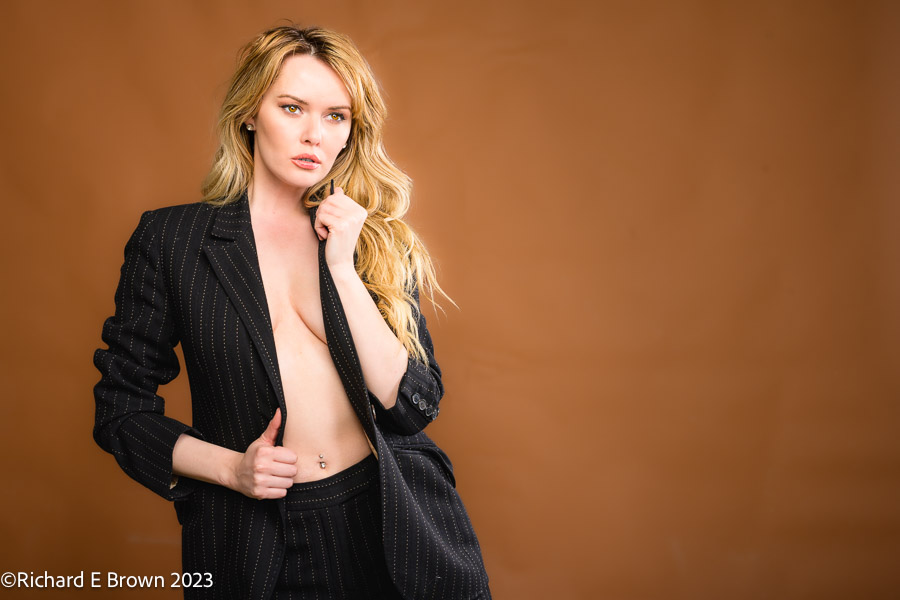
This is basically the same image but with a soft box instead of the beauty dish, a much softer light but in some ways a more boring shot that does not suite the outfit or mood as much.
Knowing when to use a soft light and a hard light is half the battle.
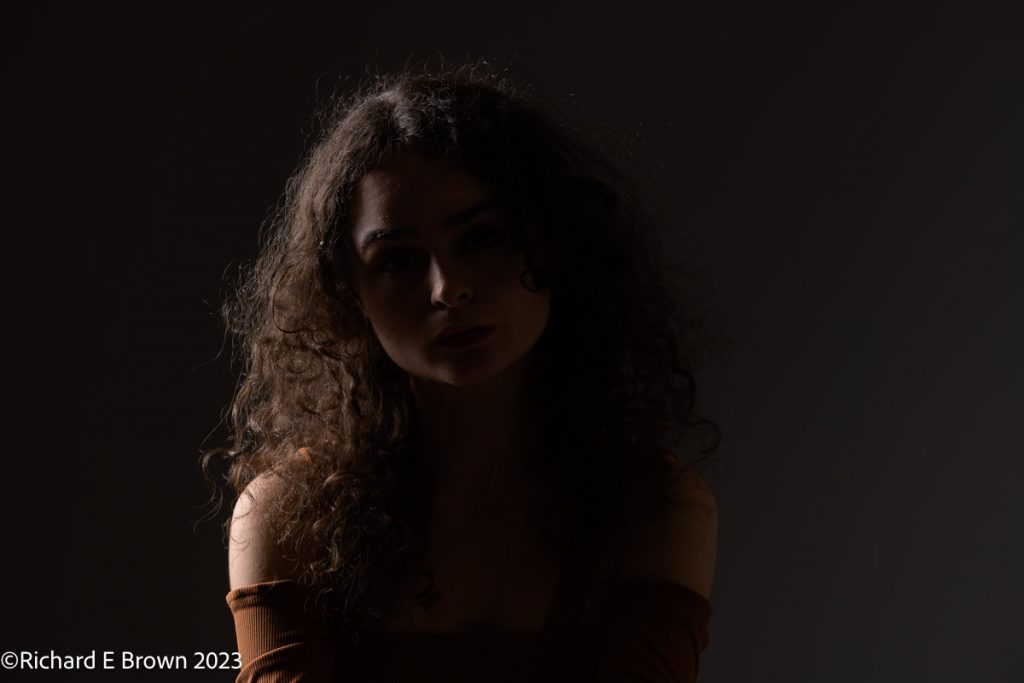
Hard light from a magnum reflector.
Soft light from two very large Oct Soft boxes.
Think about the model, her look, the clothes, the mood and feel you want, then select the light modifier to enhance this look you are after.
Hard light is often considered a no no, and I have a post on hard and soft light coming. If your into hard light, then I can recommend a magnum reflector.
Here we have a Profoto B10Plus with a magnum reflector. The magnum reflector is not a modifier I call upon often but if you’re after very strong directional light, and a good stop of light boost to what your flash can produce its quite a useful device.
Here I am using it to mimic strong sunlight flooding onto the landing off to the right.
If you have been shooting for as long as I have, you have a cupboard full of old equipment. Often old gear is not worth selling. My old f mount 180mm f2.8 AF lens is a lens that people are not going to buy. Unless you have a camera body from that era or a pro spec SLR with a built in AF motor, it will not auto focus on the current F bodies, or on the Z bodies. For many that’s a deal breaker.
It is in fact a lovely lens and in the studio with modern mirrors bodies, using older classic lens is not really an issue. With an EVF and the ability to zoom in the viewfinder to get focus right, you can in fact get some great shots.
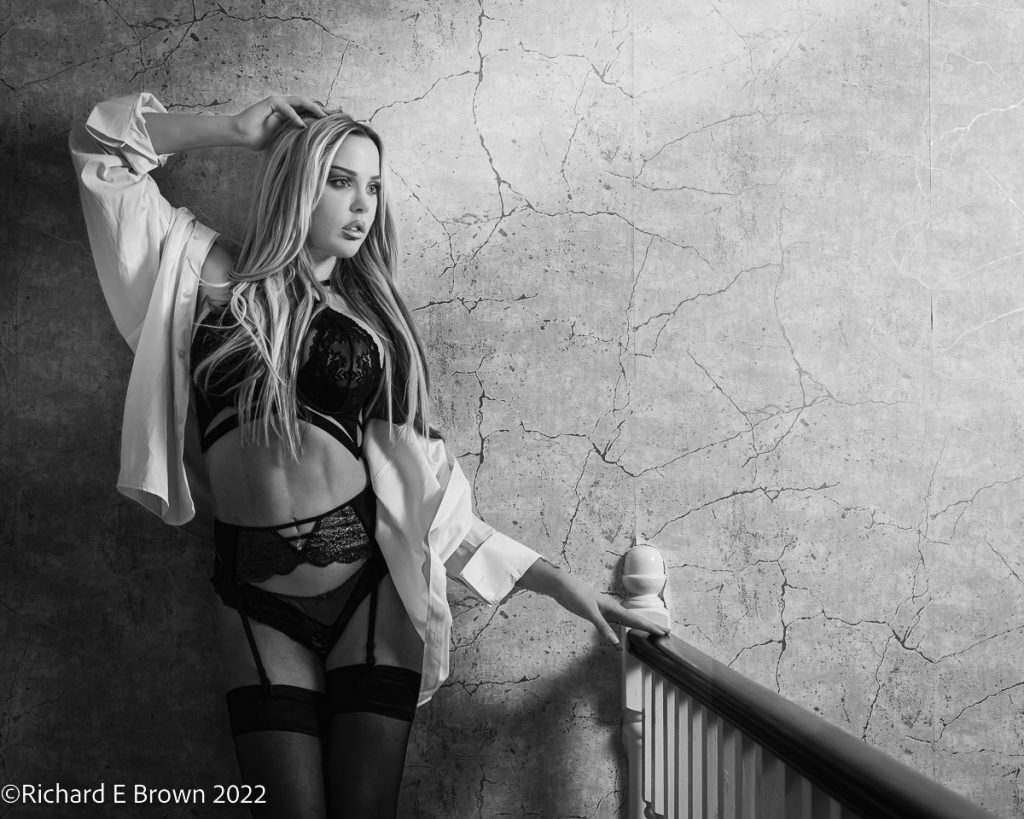
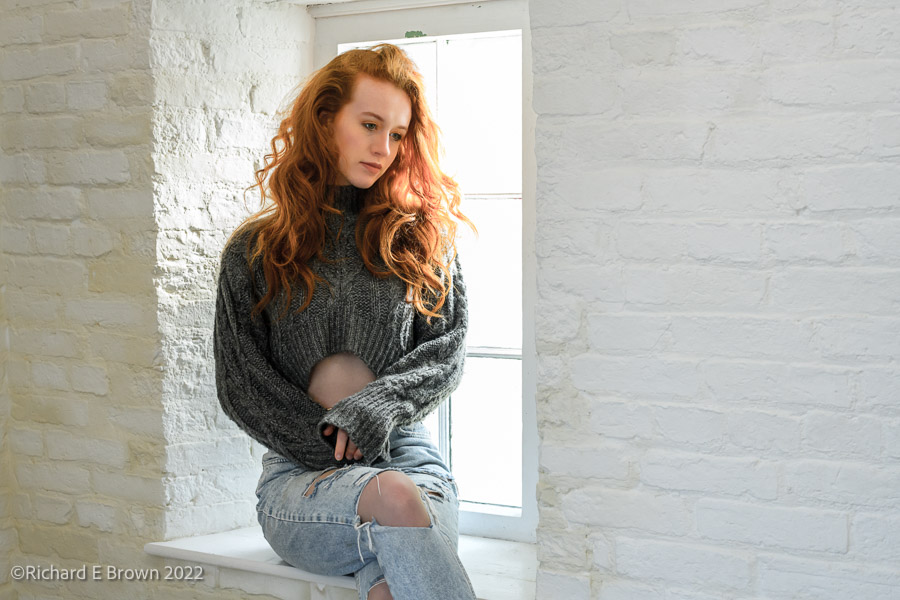
This was a set I took recently using hard light; its a single beauty disk over head, black background and the model wearing a black top and black trousers.
Nikon Z7, Z 50mm S f/1.2
The majority of the shots were taken with a F mount 105mm f/2.8 macro lens, which makes a very nice portrait lens. I also used a 50mm f/1.2 for some of them.
So I suggest next time you’re shooting a set, as well as your usual go to lens for that situation, try something a bit different. If you own a current mirrorless camera then have a look around at old lens, you may find something you love.
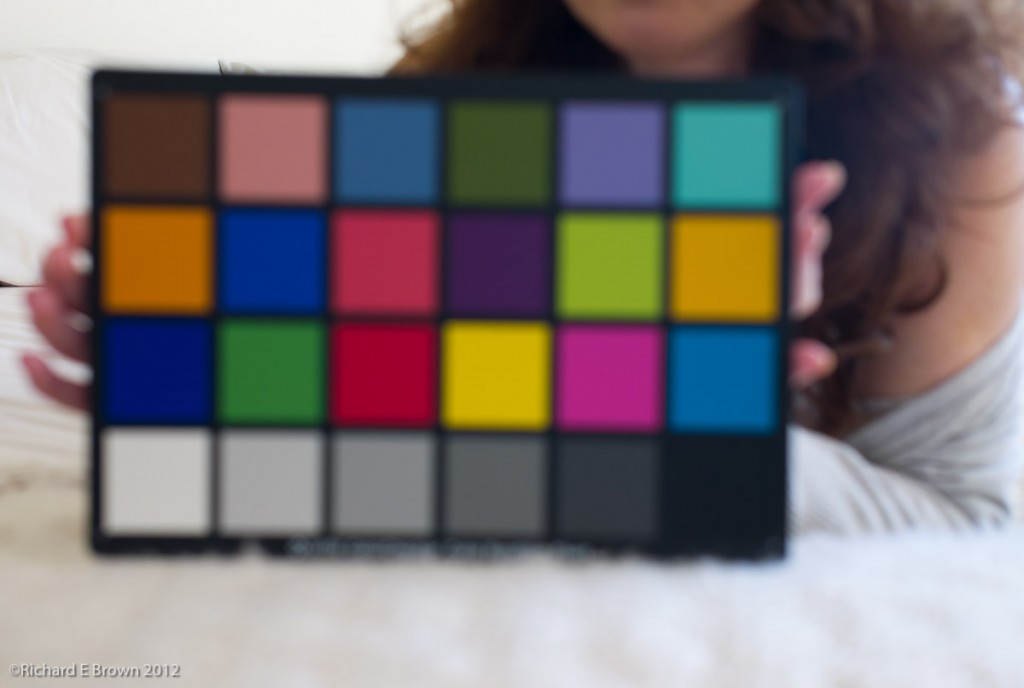
I see on the forums, YouTube and general internet sources a lot of confusion about setting a custom white balance.
Custom Profile
The main issue I see is that people are setting colour white balance using a grey card. This is potentially wrong. A grey card is calibrated 18% grey in order for you to get your metering correct. A colour checker card to set white balance has a neutral grey or white, ie the red green and blue channels are balanced.
Now you can buy 18% grey neutral grey cards, so these can be used for exposure and for setting white balance, but do not assume a grey card is neutral!
How to use also generates some debate. First thing is to get the lighting and exposure right. In the top picture, I was setting a fairly simple lighting set up. I had the model hold my colour balanced grey card white I tweaked the lighting and exposure. Do not take the white balance reading until you are setup, changing the lights and exposure can change the white balance. The picture here has a number of issues, but the biggest is that the cheap studio provided trigger is not syncing correctly with my camera thus the dark area at the bottom.
Step one, setup your shot, get the lighting, exposure all how you want.
Step two, take a photo of the subject with the colour checker, white balance card in the shot.
Step three – this is where we have some debate and it does not really matter. Either set a custom white balance using that shot in camera so that all your future shots are correct, or in your tethering software so everything looks correct. Or after the shoot most RAW software allows you to sync the corrected balance that shot to the other shots. Generally you edit that shot, do a custom white balance using the card in the shot, then sync the white balance settings across the other shots.
One last thing to consider; if like me you have custom import profiles that set a particular look, these may overwrite the colour balance, as may any other development profile you apply.
Oh and we are talking RAW, JPG bakes the colour temp into the file, it needs to be right.
What do I use and how? Well I have a couple of small white balance cards scattered across several camera bags as well as a A4 colour checker in my largest bag, so I always have something with me. As to how I use, well its naughty of me but I am not consistent.
When doing a shoot I am often in a manual white balance setting, using a card for important shots, then syncing things up at the end. It is an area I need to improve on.
Do you use auto white balance, let the camera get the exposure, or use a colour checker and grey card. Meter your flash carefully with your flash meter, or just guess by eye.
All approaches are valid but having a system that gives you a consistent base is in my opinion is best, its certainly what works for me.
That saying, getting things technically correct is not the be all of a great picture. Having a consistent base to work from makes life easier when you want to get creative.
In the picture above, I have tweaked the colour balance, saturation and added colour grading to the shadows and the highlights. The resulting image is certainly not ‘correct’ in exposure, white balance or colour but I find it a pleasing image.
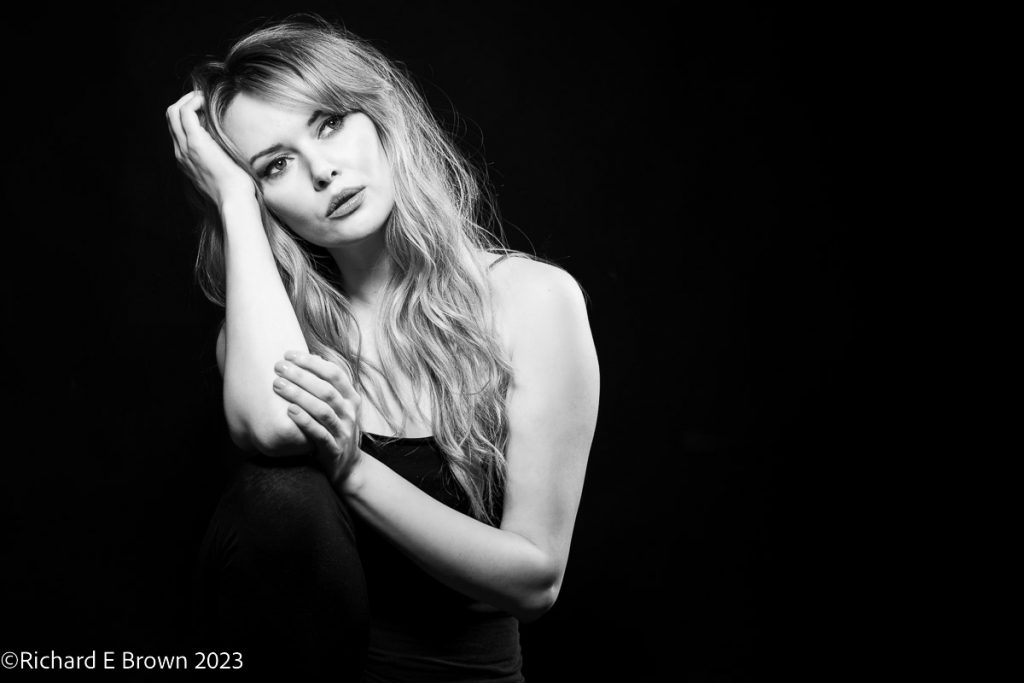
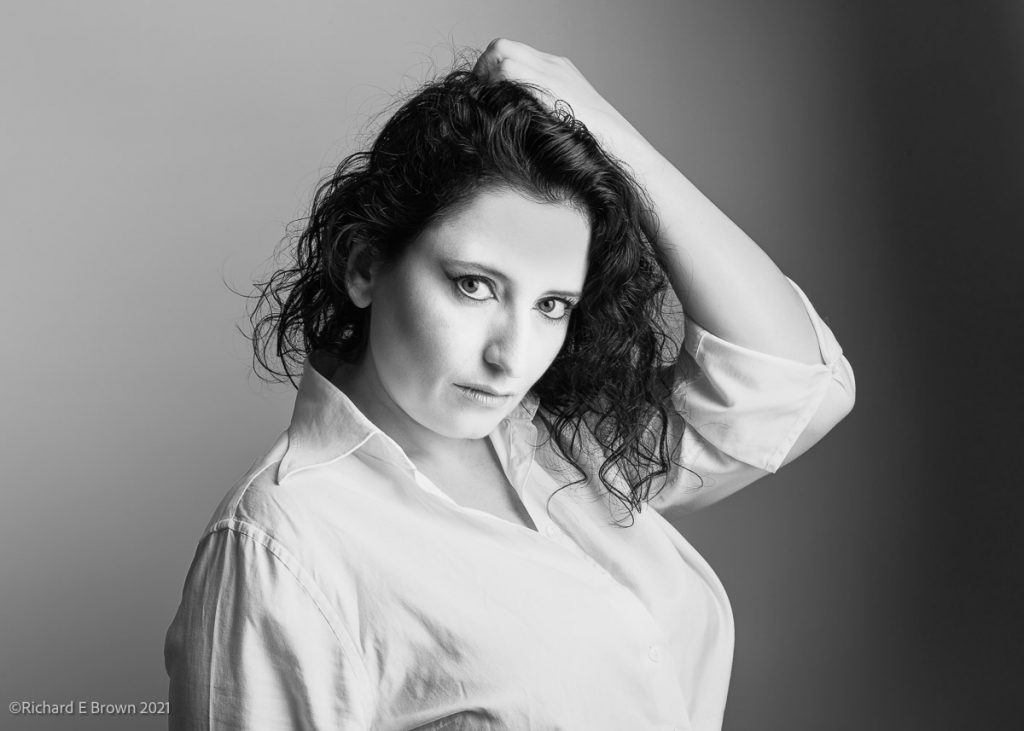
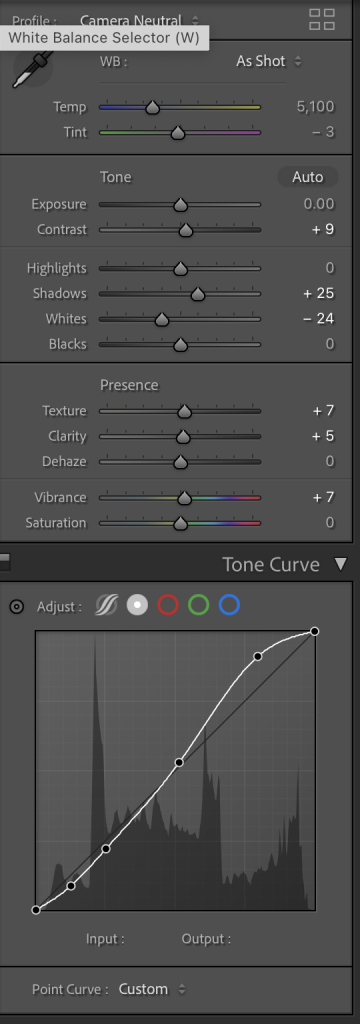
I love high contrast Black and White but it can be quite tricky.
I find using the Tone Curve in Lightroom the best way of controlling contrast and then tweaking it with the contrast, highlight and white point sliders. Starting things off with a nice high curve and gently tapering it off seems to give the best results.
These were the initial settings I started with on the original colour image, I then took it to Photoshop to add a gradient on the background and touch up the skin slightly, then back to Lightroom for a BW convert and Orange boost and then I added some more contrast.