I have mentioned in the past prepping for a shoot is very important and there are a lot of things to consider.
Well imagine your a top fashion photography and are doing a big commercial shoot.
Check out Frank Doorhof’s blog for some great tips.

Family, Photography and other misc news
I have mentioned in the past prepping for a shoot is very important and there are a lot of things to consider.
Well imagine your a top fashion photography and are doing a big commercial shoot.
Check out Frank Doorhof’s blog for some great tips.
Installing Lightroom presets can be a little tricky but Mat from Lightroom Killer Tips has recently found out, there is a far easy way.
Just Drag and drop the preset file on to your Lightroom icon in the dock.
Thanks Matt.
Of course that is if your a Mac user. If you’re a Windows user then double click the preset file. It will most likely say it does not understand the file type. Associate the file type with Lightroom and then double click will install it.
Have not tried it in Windows, as I do not have a Windows machine handy to test it on, only Apple Mac’s, Linux, and Solaris at present. Must rebuild that Windows 7 test machine of mine.
Something all photographers worry about, this the fourth in a series of posts. This time something a little different that you might not have thought of.
Are your shots tack sharp?
Try using your mirror lockup, something I always use on my
Hasselblad when shooting landscapes, most digital SLR’s have
this function these days.
On lower end DSL’s it is generally buried in a sub menu, but on higher end models there may be a dedicated button or dial.
Something all photographers worry about, this the third in a series of posts will look at:
Aperture
The aperture you use can have a major impact on sharpness. The effect can be pleasing or unwanted.
Generally most lens will be a little unsharp wide open, for a fast portrait lens a little unsharpness round the edges can be quite pleasing. The main difference between ‘professional’ lens and ‘consumer’ lens is generally, they are faster and a little sharper wide open, but you can still get great results with cheaper lens. The key is to use them at there optimum aperture. Most lens even the cheapest can perform quite well when stopped down a little.
If your after a simple rule use your lens at f/8 or f/11 and you will get the best out of it.
There is also another consideration. Defraction. Closing down the lens a little does improve sharpness but closing down too far actually starts to lower quality as defraction starts to impact. So as a general rule close down a stop or two for maximum quality and sharpness but don’t stop down too much and only shoot wide open open if you want a slight softness.
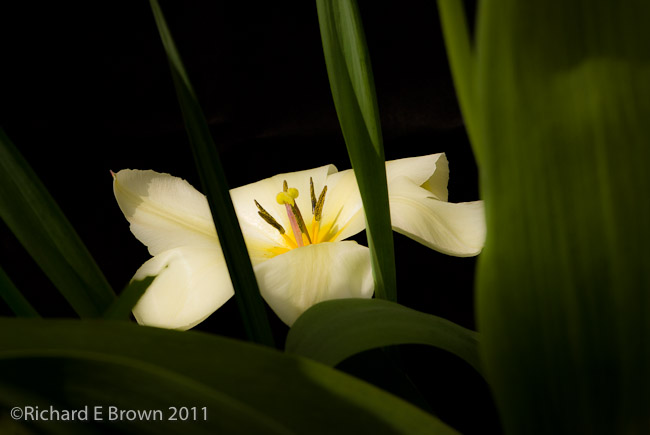
I was thinking that I would have my next flower photo shoot in the studio, but then I thought it would be good to show you what could be achieved with just two flash guns outside on a sunny day.
The setup is relatively easy. Camera on tripod with hot shoe flash and a moderately short telephoto lens in my case a D200 with a Nikkor 105mm f/2.8.
To my right I mounted a Nikon SB-800 hotshoe flash. This was mounted onto a small light stand and was firing into a small brolly.
The camera mounted flash was set up as a trigger and was not contributing to the overall exposure.
Behind the flowers I had a black cloth. This was supported by the usefully provided double ended clip that comes with the Nikon Macro Flash kit.
The actual exposure was very simple I switched the camera to manual and set the flash to FP Hi speed sync.
I picked a shutter speed in conjunction with an aperture to give me sufficient depth of field and but would underexpose the picture. The flower exposure would be handled by TTL flash.
After a couple of test shots, the photos looked a little dim, so I dialed in +2/3’s of a stop and they looked good.

Something all photographers worry about, this the second in a series of posts will look at:
Tripods.
Most people own one, but how many of us actually carry one with us. I’ll put my hand up. I certainly don’t use it as much as I should.
A few points to consider, a tripod thats not with you is useless.
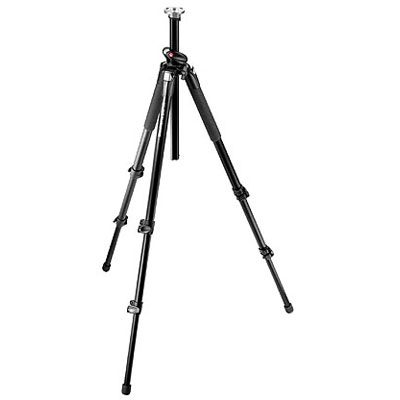
Invest in a good one, a good head and get the brackets for your camera.
If your looking at saving money then spend all your budget on a set of legs. Then when you can afford it buy the head later. Then buy the brackets for the camera. If your eager to start using your tripod then buy a cheap head that comes with a quick release platform, but beware you will need to replace it. A poor head design will after a while frustrate you to the point you will stop using your expensive tripod.
If your after a recommendations for legs then Manfrotto and Gitzo are top of the class.
For heads then most pro photographers use not Manfrotto or Gitzo heads but Arca or Really Right Stuff Heads. A warning to you, you can spend over £1000 on a good head. For most of us that is over kill but do consider spending over £100 pounds.
Lastly a brackets for your camera. A cheap quick release plate may do to start , if your using medium format or large format then this may be all you need. For 35mm where you will be switching from portrait to landscape and back, and generally be more active on the tripod you may want to consider custom brackets that will not slip once fitted.
For more information see a previous blog entry here and also Chris Bennet’s blog.
Film: Loading a camera.
A bit of a lost art now a days. Most 35mm SLR users have now switched to digital, and most of the last 35mm SLR’s were auto loading. For users of medium format, large format camera’s, film is still the medium of choice.
For Hasselblad users of the V system, loading a film for the first time can be tricky so heres a very useful youtube video to help you out.
Something all photographers worry about.
Most photographer’s solution to this perceived problem is to spend lots of money.
Lets get back to the basics.
First Hand Holding.
Support the camera with your left hand, cradle it and take the weight. Hold the grip with you right hand.
Firing the Shutter.
Don’t just jab at it, press gently, both the depress and the release should be gentle. Camera movement can be introduced at this point.
If necessary use your motor drive. Shoot a batch of three pictures using it. Your first shot might be blurred but the second is likely to be sharp. Release after the third shot.
What is your shutter speed? It should be at least the reciprocal of the focal length.
If your focal length is 50mm shoot at 1/60 of a second at least. If shooting with a 200mm lens use 1/250 etc.
If your hand holding technique is particularly bad double up, for a 50mm lens use 1/125.
Understand VR.
Use it at slow shutter speeds but once your speed climbs above 1/500 – 1/1000 of a second turn it off, above 1/1000 it can actually make your pictures worse.
Subject movement.
Don’t forget subject movement, use a fast enough shutter speed to freeze any movement in the scene.
Tripod’s.
Well i’ll mention those next month, but check out www.cbphotoblog.com and www.bythom.com

Lastly something that I am particularly bad at. When you use a large aperture then focus is critical. I hate to think how many killer shots I have just missed because my model is out of focus, when using the f/1.4 – f/2.8 range.
Tomorrow I have a half day’s shoot, a mix of location and studio.
The Studio is booked and so is the model, I now have less then 24 hours left. What should I be doing, what should you do to prepare for your shoots.
Well, for a paid shoot, my preparation starts at least a month in hand, for weddings sometimes over a year in advanced.
Tomorrow is just a simple test shoot but still preparation is key. Obviously at this point the studio is all booked, location checked out and the model booked, what else should you consider.
Well, communication with the studio and model, all should continue. I generally drop the studio and the model(s) an email a week before and the day before. Just to ensure everything is clear. Times, addresses, shot list, themes, clothes list. Also contact details. My email and phone number, the studio’s / location’s address, meeting points etc.
Equipment is important, and should start at least week in advance. Check and clean everything, decide on what lens, what format’s. For this shoot I will be shooting APS-C cropped DSLR and medium format. The Digital SLR’s will be a pair of Nikon D200, perfectly adequate for this. A wide angle zoom, a fast f/1.4 standard lens, a 105mm portrait lens and a standard fast f/2.8 zoom and telephoto zoom. The medium format will be a Hassleblad, with standard lens and two backs.
The lens I have chosen with the shot list in mind. I will also be taking two light meters, a heavy tripod, light stand and brolly with infrared trigger.
A week before the equipment was all checked, batteries all charged. It was at this point I realised one of the batteries for Nikon D200 was starting to not hold its charge, so a trip to the local camera shop was planned, and I purchased a replacement.
The shot list was all written down as was the clothes list, and provided to the model, there is also a few items I will be providing, so tonight as well as packing the camera bags, and lighting bag, a prop bag was also packed. Things like fans, glasses, hats, etc.
For the IT geeks like me there are computer applications to assist. I use the simple PhotoAssist. This is a useful little app for the iPhone and iPad that enables you to create equipment lists, prop lists etc. I have custom lists for things like Nature, Portrait, Weddings and Travel. This list the common things I need for things like these.
If there is any advice I can offer it is just this. Communicate, ensure all parties know exactly what is required of them and when. Have your equipment ready; cleaned, checked and know how to use it.
If you do not know your equipment, then you cannot focus on the picture. Remember your equipment and how to use it, should all be second nature to you. All your attention should be focused on getting the image and keeping your model engaged, and happy to work hard with you to get the image.
Using your hotshoe flash in your camera hotshoe is about the worst way of using it. Getting off camera is the best way, but how to do that. Well if you happen to have a light-stand you can use the method I use.
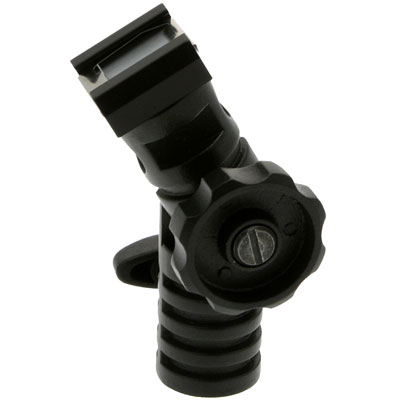
I recently purchased a Lastolite Tilthead with hotshoe. Its a way of getting studio quality light thats easy and portable.
 This on top of a light-stand enables you to attach a normal camera flash gun. It also allows you to attach a standard brolly. With this simple setup you can get studio quality light with very little cost. It certainly does not have the power of studio flash but can produce great results.