
Tonight here in the UK we had the Apple Press conference streamed. I was expecting Thunderbolt 3 and was not surprised to see four TB3 ports on the mid and high end models and two on the low end. I was also pleased to see the headphone socket retained. What I was sad to see was the loss of the MagSafe port for charging and also the lack of HDMI and USB3 or Ethernet. Now we need to carry more dongles until the rest of the industry catches up.
Its also given Apple a bit of a problem with consistency, the iPhone headphones are now Lighting port but we have no Lighting port on the MacBook Pro, so you cannot use the new headphones. If you just bought a iPhone 7 you cannot even plug it in to your shiny new Mac to charge or sync with iTunes but are limited to syncing over Bluetooth.
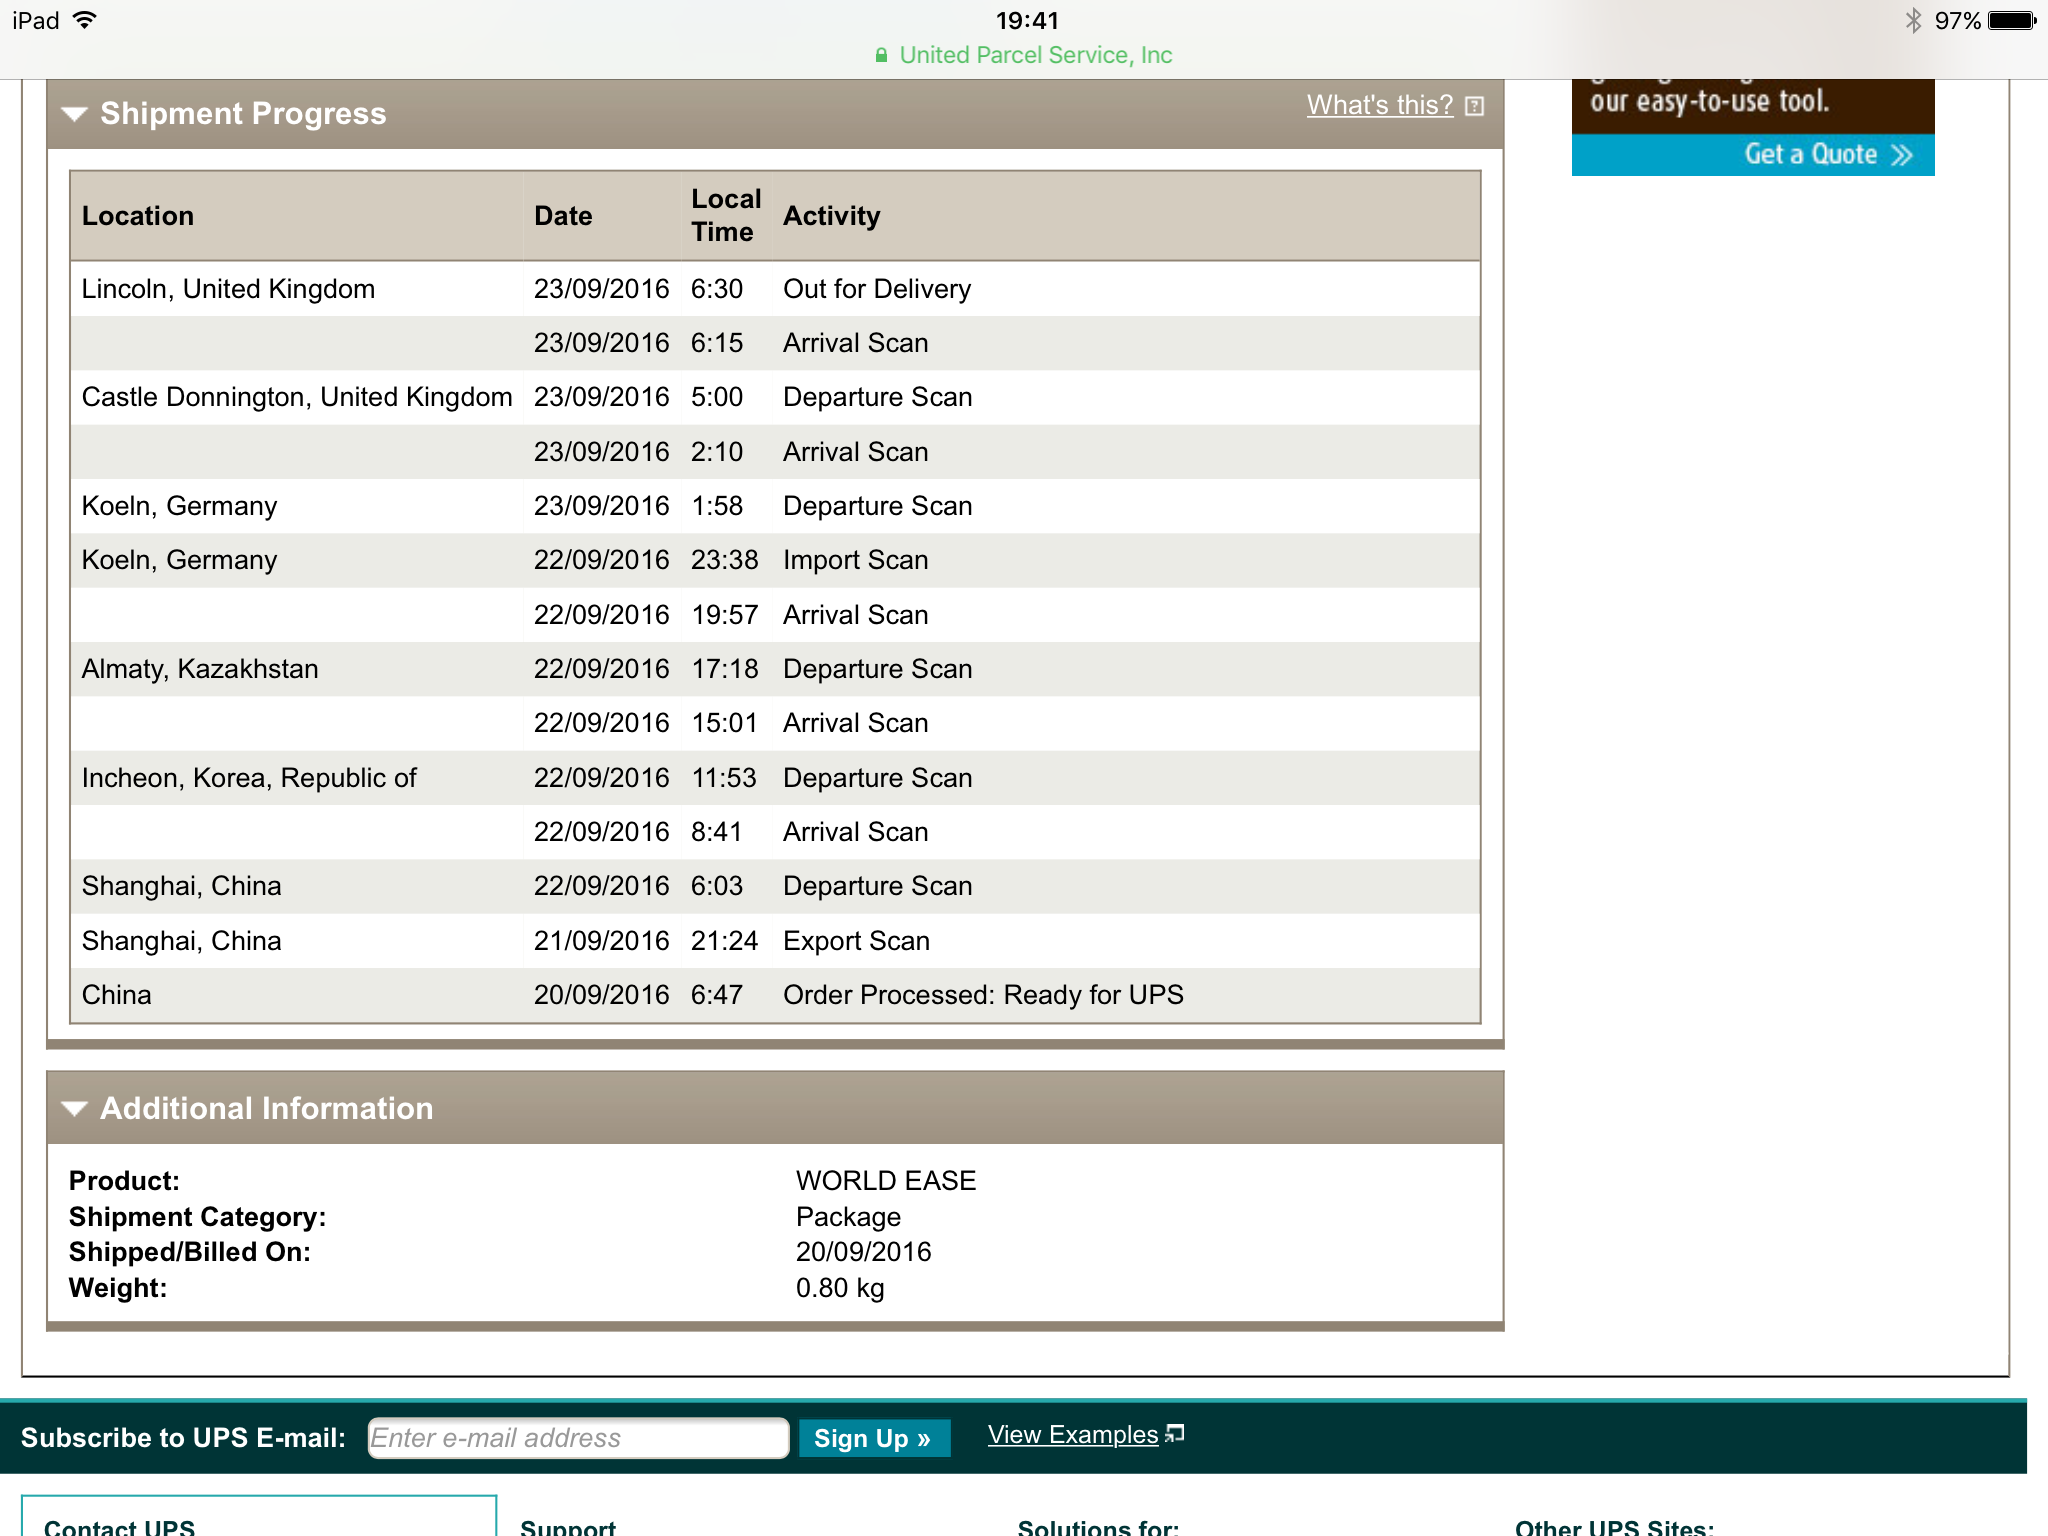
I had a quick look on the WEX Photographic website for CF and SD card readers for TB3 or USB-C (its the same port), they had USB 2, 3.0 and TB2; so more dongles to carry.
I have to admit there nice machines but for me i’ll keep using my old laptop for a while longer until TB3 and USB-C get more common and Apple sort out their inconsistencies with the iPhone.
If I did need a laptop for light work I would buy the bottom of the range 13 inch MacBook Pro, while it just has the two TB3 ports it would work ok for light work.