Luminous Landscape have some early reviews of a pre-production Sony NEX 7.
http://www.luminous-landscape.com/reviews/cameras/sony_nex_7_first_impressions.shtml
Looking forward to trying one out.
Family, Photography and other misc news
Luminous Landscape have some early reviews of a pre-production Sony NEX 7.
http://www.luminous-landscape.com/reviews/cameras/sony_nex_7_first_impressions.shtml
Looking forward to trying one out.
Engagement with your subject.
What do I mean, well for wildlife, landscape etc, its more about knowing your subject.
For people photography its about talking to your subject, involving them in the picture taking process.
With a professional model you can focus more on your picture taking process, your lighting and technique. Professional models know what its all about, but you should still involve them and keep their interest.
For people who have never attended a photographic session, then engagement is absolutely critical. They should be your primary focus, the technical side of photography really needs to be effortless and not really require any real thought.
Know your subject and engage with your subject. Your picture will improve.
Previously I discussed Work Flow and went into a little some detail about importing and backing up.
Today I am going to briefly go into Digital Asset Management. A good DAM program is essential for professional photographers. Its all about being able to find your work. Many photographers have lost sales due to being unable to find a shot. DAM, together with key wording and metadata allows you to quickly find those photographs.
Even if you only shoot a little, I would recommend you still incorporate these techniques into your workflow. If your a light shooter, only photographing holidays and family event, being asked maybe eighteen later for a photograph of the birth of a child to blow up at their eighteenth birthday party, and not being able to find it can be heart breaking.
So what DAM package should you use, well you need something that suits your workflow, for many thats just a well structured folder structure and correct metadata information on the image files. For others thats a full blown DAM application.
If you want to know what I use well that is Adobe Photoshop Lightroom.
It works very well and also also fulfils other roles within my workflow as well. Its available for both Windows and Apple Macintosh. If your a Mac user then Apple’s own Aperture is well thought of. DigitalPro V6 is also well thought of by Windows users.
The key is to have a system and follow it.
Well now that the nights are getting shorter, the mornings delightfully cool, the early mornings and late evenings are being blessed with the kind of light photographers love.
The low sun, warm light, really seems to give a lift to things.
Heres wishing good photographic light to you all, good night.
Many people buy a camera based on the camera bodies specification, but when buying into interchangeable lens cameras, you are buying into a system.
I shoot Nikon for my SLR needs, sometimes Nikon have the best bodies and sometimes its Canon. Lets not forget Sony, Olympus, Pentax or Panasonic.
Look at the whole system, and think about the sort of photographs you take and what will help you get those photographs easier. You want a system that helps not hinders.
I currently have two camera systems, Nikon DSLR and Hasselblad. Both quite different and I could not say one is better then the other. Obviously the Hasselblad being medium format gives slightly higher quality results, but using it is slow and a tripod is essential. The Nikon has much to recommend it. The flash system is fantastic and the range of lens makes it far more versatile.
What might surprise people is that I have been after a third camera system for a number of years. This needs to be high quality, interchangeable lens, and small, something consisting of a body three lens and a view finder that can be packed into a motorcycle’s tank bag.
I have been researching and testing cameras at my local camera shop and after several years I am still no closer to buying one. Once purchased, while bodies may come and go the lens will be with me for many years.
The English, and I could possibly say the British in general have a fascination with weather. Compared to many countries the weather in and around the British Isles is generally benign, but it is certainly variable and difficult to forecast.
As someone who rides motorcycles and where possible flies planes, I have a somewhat more then a passing interest in the weather. It also has a great impact on photography. The best shots are always when bad weather is slowly changing to good.
As an all year round motorcyclist, weather is generally not something that stops me from riding a bike. Surprisingly hot summer is not my favourite biking season but the autumn is. The weather is a little cooler and not too hot, and you and your machine have really become one, having had the past six months to ride in the ever improving weather.
My least favourite weather for riding, is snow/ice, fog and wind. Today we have had the pleasure of ex-Hurricane Katia. Luckily the wind has been strong but steady. Sudden gusts are the worse.
If you see a biker taking it steady in strong wind, please give him plenty of room, you never know when a sudden gust could take him either into the hard shoulder or into the other lane.
I appreciate good service. This has been highlighted recently, with once again sterling service from WareHouse Express, and Hasbean Coffee.
Last week I had the displeasure of getting poor service from a local garage. An email to all the directors of the company did cause then to change their minds and accept my reasonable demands but its a shame when you have to twist arms to get the service that should be expected. I am certainly glad I am not treated that way from the Bike Garages I deal with.
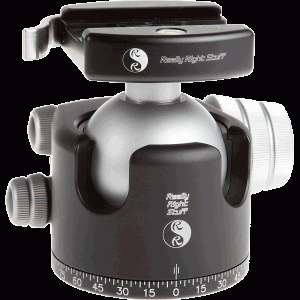 This week I ordered a new heavy duty tripod head and was very pleased with the service. Placing the order last weekend to Really Right Stuff, in California, well before the week ended its here in my hand. Well done.
I am just waiting for my new tripod legs from Italy and I have a monster of a solution for when shooting from vehicles, in the studio and when on a ladder. Not a solution for everyone but I enjoy the perspective you get from shooting down on models.
 As you can see, only a little height can add interest to a shot.
This week is Photoshop World. Many photographers are members of NAP and I am sure many American photographers as well as some from further a field have made the trip to see what Adobe has to offer them.
With products like Adobe Photoshop, Adobe Lightroom and Adobe Elements, the majority of photographers have at least some piece of Adobe software they rely on.
Whether your a Windows user or a Macintosh user, they have a product for you.
One of the more curious things they have shown off so far is Adobe Carousel. Details are still few and far between but it seems you can sync photographs with a device, whether it be your iPad or Laptop and have then synchronised by the product to all your devices. Sounds intriguing!
Check out Terry White’s Tech Blog for a few more details.
Sony have always been a company to admire, producing some interesting designs over the years. I have a Sony TV, Sony PVR, and for a long time was interested in the Sony P Series mobile phones.
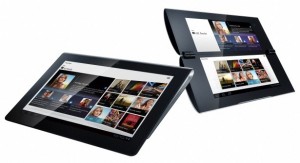
Over the years they have produced a number great products and have now entered the Android Tablet Market with the Sony Tablet S and P models.
I was hopeful that the HP Tablet running WebOS and RIMs new Playbook was going to give Apple some competition, now it looks like Sony are going to be taking up the challenge.
From a photographers point of view unfortunately they don’t offer any real advantage over Apples iPad. Maybe the next version.
A quick review from a photographers point of view is here at Luminous Landscape.
I recently read the new iPad Magazine Light It, there was some interesting techniques and generally it showed techniques that are currently in fashion.
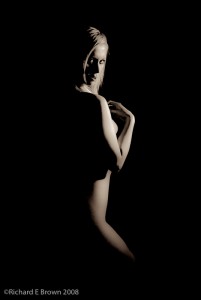
Today I looked at a very old lighting techniques book. I bought it many years ago, and it was written in 1940s. Some of the rim lighting techniques and back lighting techniques that it goes through are actually now back in fashion.
We may have moved from taking portraits and fashion shots on large format film cameras, to medium format, then 35mm SLR, to now our modern medium format and SLR digital format cameras but the actual techniques have not really changed.
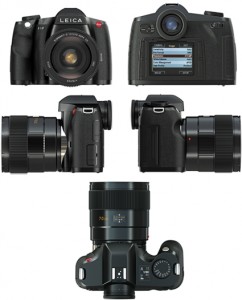
 I have to admit, if money was no option I would love something like the Leica S2 for Studio use.
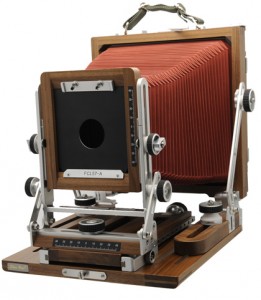
I would also love a large format camera. I have used one in the past and it really slows you down and makes you think.
If you want one try www.robertwhite.co.uk
What ever you use, Large Format, 35mm, film or digital, enjoy yourself. Now off to shoot some fun snapshots with my camera phone!