
For those of you who shoot jpeg, do not edit in post and send your images off to typical print shops, then you probably just have your camera set to sRGB. sRGB is a very limited colour space and cannot show as many colours as modern printers can print. Its the typical output of a standard cheap monitor. In fact many high end displays can only display sRGB, but it is most cameras default setting, and what most print shops assume your camera is set to and what the file is set to.
If you are interested in producing the best output possible then you need to set your camera to AdobeRGB, this colour space can show more colours.
When editing even AdobeRGB cannot handle as many colours as your camera may capture or in fact what a high end pigment printer can print. If you are after the best results then you want your working space to be ProPhotoRGB.
Recently I upgraded by computer by installing an SSD, best upgrade ever and now my four year old MacBookPro is as fast as when I originally bought it even running the latest software.
I decided to do a fresh install of my applications. Unfortunately this caught me out recently, when I discovered some of my recent edits have not been quite as good as they could have. Unfortunately some of the defaults for Adobe Lightroom and Adobe Photoshop are less then optimal.
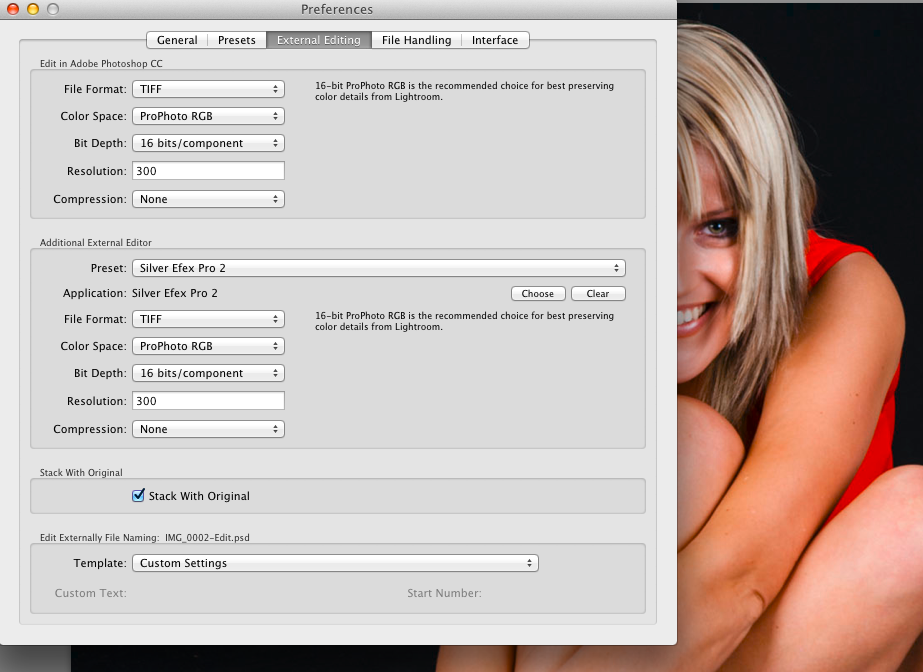
Now Lightroom is very good; you cannot actual set a working colour space, it uses its own created by the main developer but it can be considered to be similar to ProPhoto, the difficulty is if you export it to a third party program, if the third party program will accept it you need to set the Colour Space to ProPhoto RGB, by default Lightroom will export it as sRGB in 8 bit. This can be limiting and can cause issues with banding and artefacts appearing in finished image.
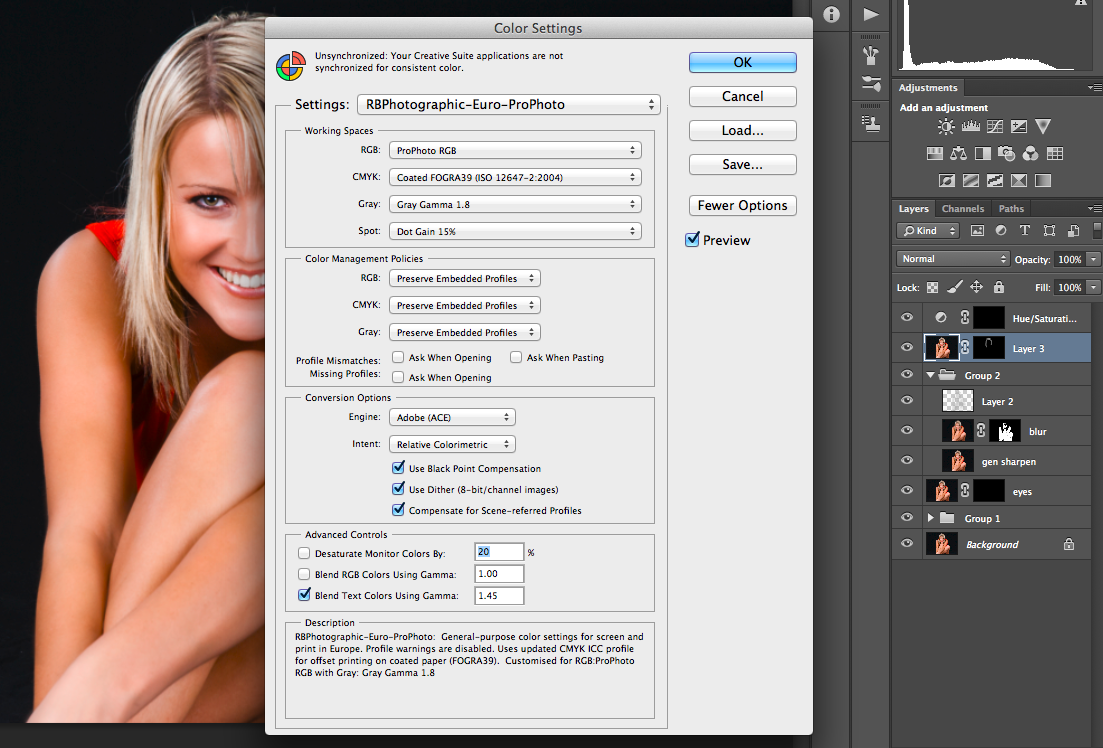
In Photoshop you get to the colour settings by pressing Shift-CMD-K. I would suggest you start by choosing either Europe General Purpose 3 (for Europe) and America General Purpose 2 for the USA.
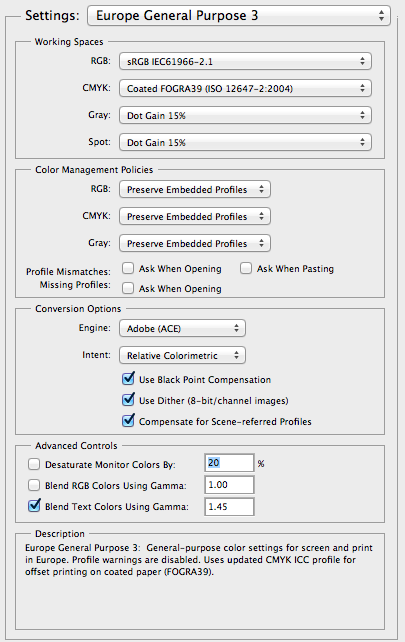
As you can see the default is sRGB which needs changing to ProPhoto RGB, Gray wants setting to Gamma 1.8, yes there is a Grey Colour Space which consists of shades of Grey! Once these are set to your likings then I would suggest you save it. If your copy of Photoshop does not show as many options as above then have a look to the right, there is a button marked more options. Press this and more options will appear.
So is this extra effort worth it, well it only needs configuring the once so its not really any extra effort but i’ll let you be the judge, here is the final edited picture of Lisa.

In case you are wondering this image as been converted back to sRGB to be put on the web. Many web browsers cannot cope with anything else then sRGB and do not support colour management. It is getting better as Safari and Firefox now both support colour management.
2 Replies to “Colour Spaces & Working Spaces”