Shetland Islands – Landscapes

Photoshop Touch
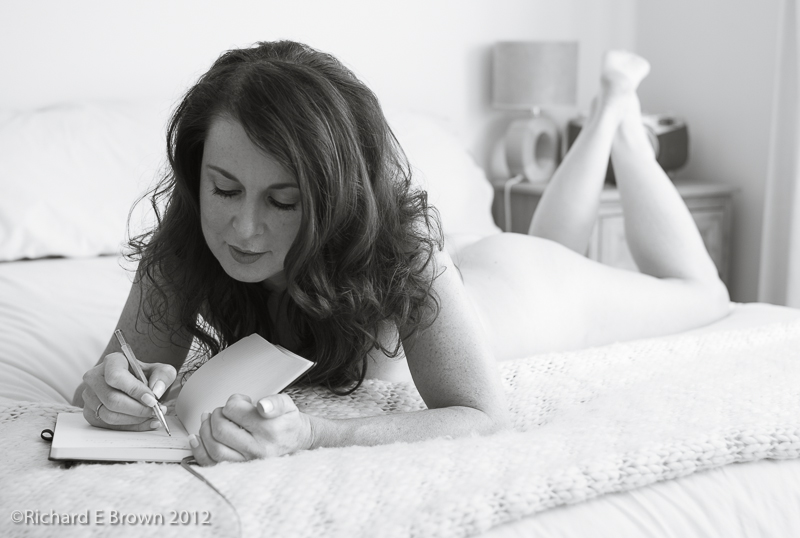
It took a while but we finally arrived and settled into our cottage we had hired for our time up here.  The scenery outside the window was fantastic, wherever you go on the islands the views are fantastic.

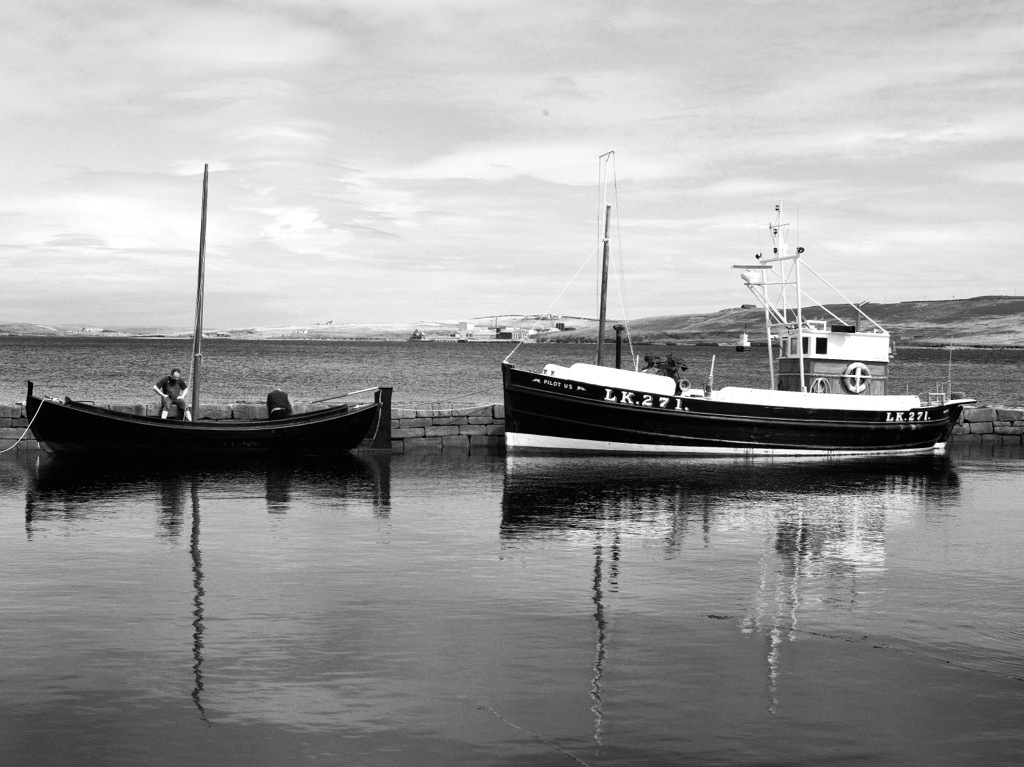
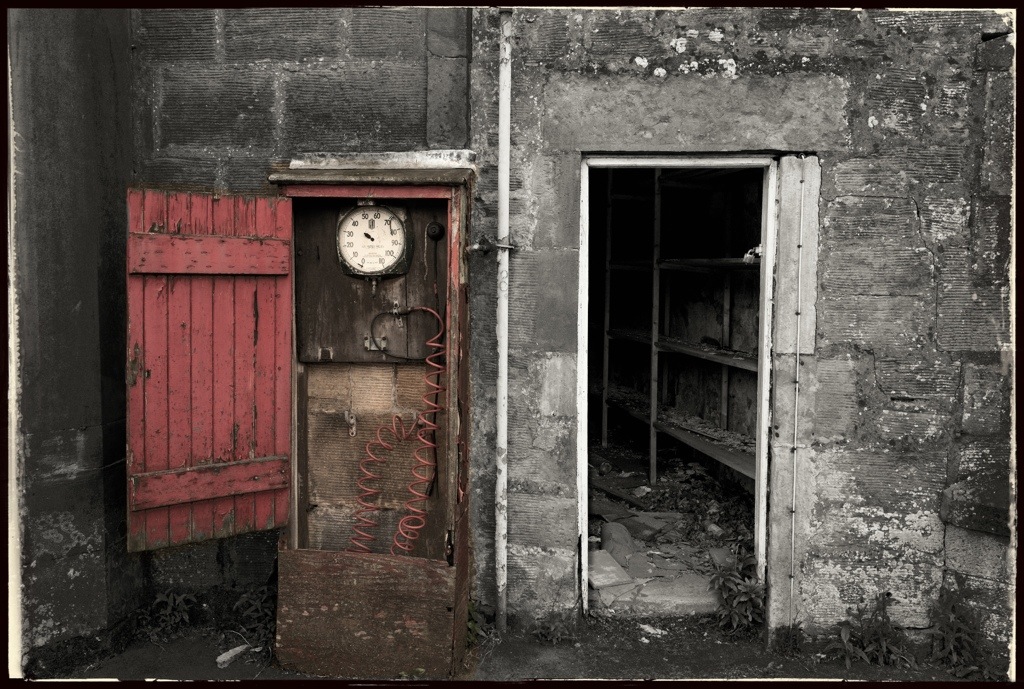
In someways it can be a difficult area to photograph.  You need to choose a focal point, dramatic landscapes you see with your eyes and feel in your hearts do not translate well to photographs.

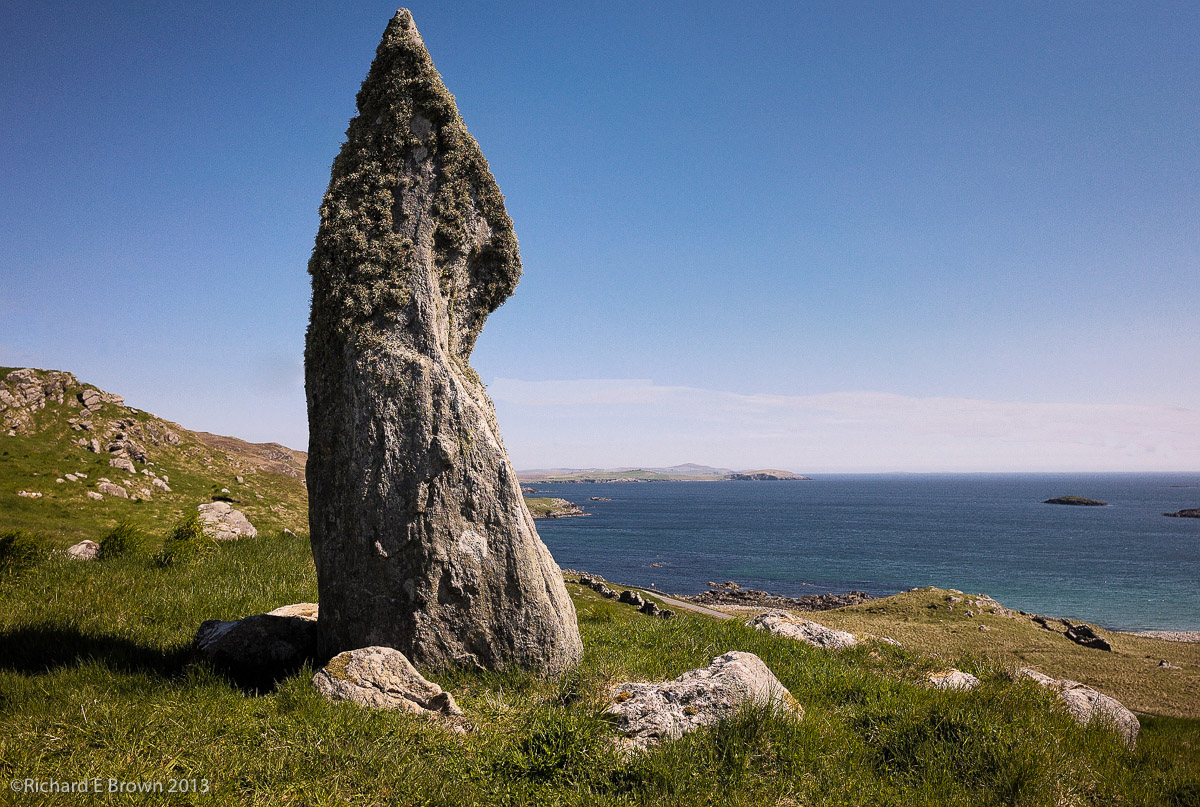
As I have already mentioned in previous blog entries; on this trip I did not take a laptop with me but just the iPad.  The above photography is a bit of a cheat, with the hill behind the stone there is no sign of human habitation, but in the above view there is actually a power cable running across the scene.  I’ll be re-editing this shot in Adobe Photoshop but this version was actually processed on the iPad.  The RAW converted to a jpeg with PhotoRaw and then taken into Photoshop Touch to have the wires removed.

It is incredible what you can accomplish now with these tools.

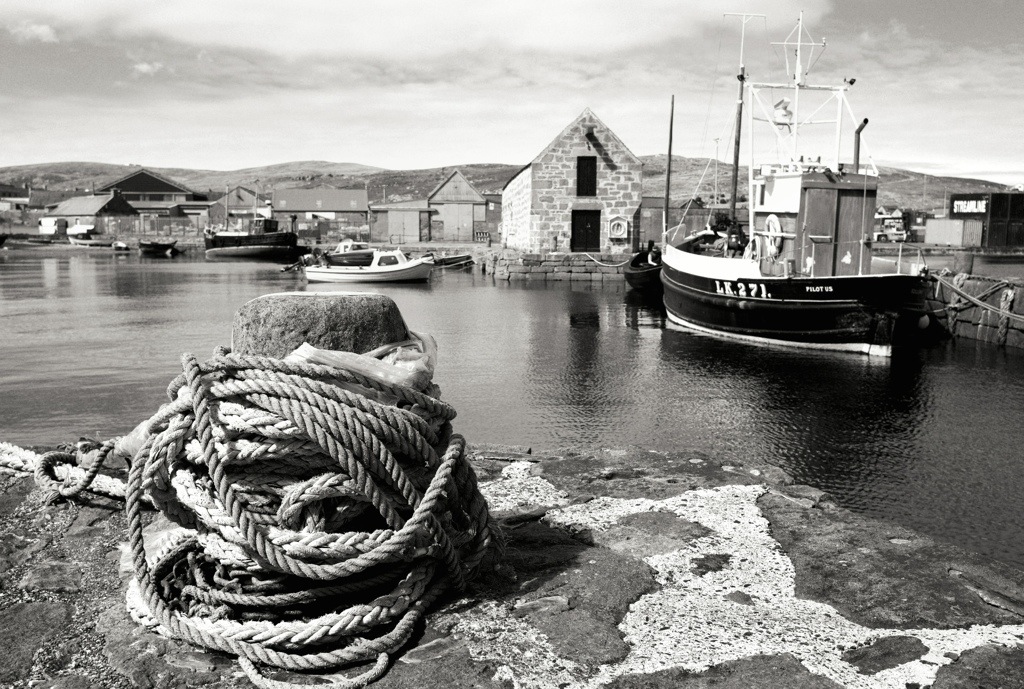
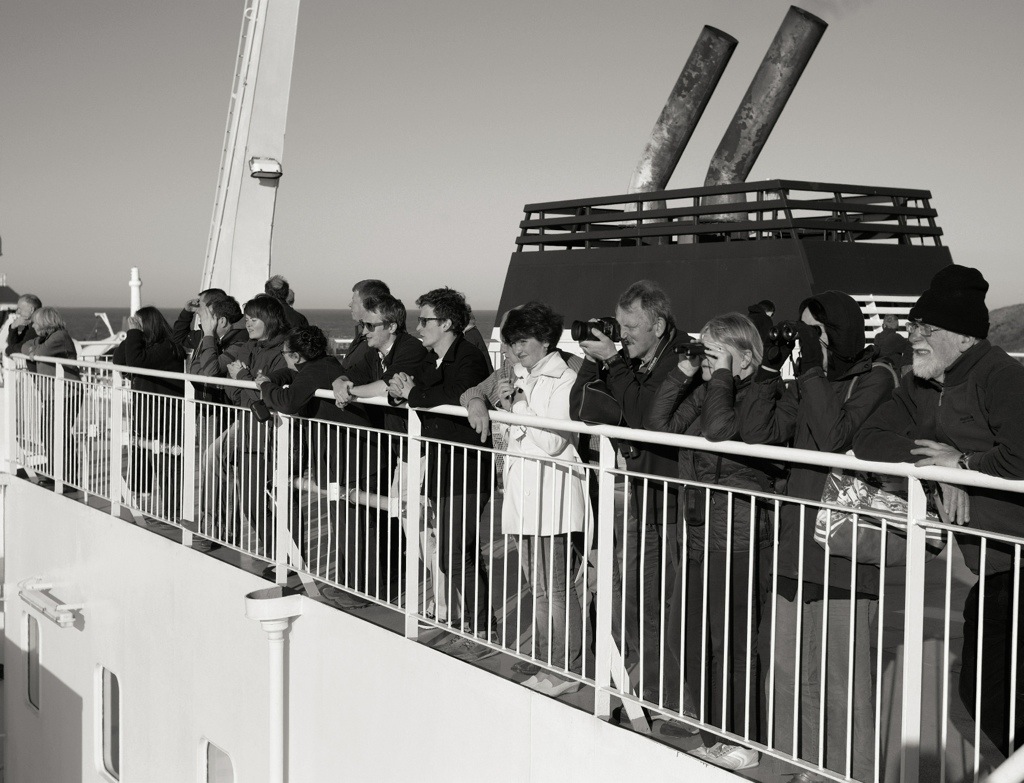
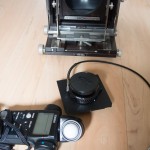
We visited quite a few of the islands and I found a number of locations that will make fantastic photographs, but I actually only took two large format shots.  Most of the photography was snapshots for future reference using either the iPhone or the Leica M8. The problem was the light.  The weather as you can see above was fantastic; that is fantastic for a holiday not for dramatic photography.  We were closer to the arctic circle then we were to London and the days and nights merged into one.  It was not often dark and the sun too high for great photography.  Still I got a few nice shots and have found some locations that I’ll be revisiting.  I’ll certainly be visiting next time closer to the equinox then to the Summer Solstice.

Arriving on Shetland

20130528-220518.jpg

The overnight ferry arrived in the capital Lerwick at 7am. We had a walk round the town and enjoyed a large cooked breakfast when we found an open cafe.

20130528-220600.jpg

The town has a mix of modern docks but also some of the small original Victorian docks, little used now but very photogenic. The new Shetland Museum and Archives are next to the original docks and one can easily while away a couple of hours.

I’ll be spending the next few days scouting around the islands and finding good locations. I’ll also be visiting the beaches and cliffs in the hope of getting some good wildlife shots. It will involve a lot of walking and we intend exploring some of more remote islands.

Travelling up to Shetland Islands

The Shetland Islands are some of the most beautiful islands in the British Isles. The easy way of getting there is to fly and to hire a car. We did it the hard way, a long drive up on day one, stopping at Kinross.

Day two was and easy drive to Aberdeen where we caught the over night ferry to Lerwick, the modern capital of the Shetlands.

Once on board we found some comfy recliner arm chairs and made ourselves at home.

The ferry was due to depart at 19.00 that night. Just before we set sail I headed up on deck with the Leica M8 and the 35mm Summicron.

I photographed a few structural items on deck and also took a few shots of Aberdeen with my iPhone which I tweeted (@r1chardbwrn).

As the ship started to sail we had quite a crowed join us on the top deck, as well as photographing the city, disappearing into the distance and setting sun, I photographed some of my fellow passengers as we watched the city disappear over the horizon.

20130528-214845.jpg

I thought the people on board made more interesting subjects then the scenery.

When we took the ferry from the Isle of Skye to the Outer Hebrides I took the SLR, long lens and monopod, this time with it being an overnight ferry to the Shetlands, the big lens and SLR’s were safely tucked away in the boot (trunk to our American Friends) of the car. I spent the crossing trying to photograph the puffins. So this time my subjects were the ship, crew and passengers.

20130528-214926.jpg

That evening I once again backed up my shots to my iPad and added keyword and metadata information to them using the PhotoSmith App. Time to sleep and rest ready for our arrival on the Island.

iPad Photo Editing in the field

The iPad (or insert your favourite Android, Palm WebOS tablet OS here), are consumption devices and toys not suitable for real work is what you are always told.

Well to be honest they’re not suited for Photography heavy lifting but its surprising what you can accomplish.

I went out with a small Billingham Hadley Bag carrying an iPad, Leica M8, spare memory cards, camera batteries a couple of lens for a walk while the rest of my Photo gear was safe in the hotel.

20130524-073453.jpg

I took photographs of the pretty little church, a few other buildings and a few people who looked interesting.

We then passed a rather small old garage that had stood unused for a number of years so I had to take a few shots.

After a meal we were relaxing and I decided to see what I could do with a few of the images. I have a iPad2 and using the camera connection I imported all my photographs, I usually make a backup of my photographs at the end of the day like this when I do not have a computer to hand. This then gives me two copies, one on the memory card and one on the iPad, once back home I always ensure I have three separate copied before wiping the cards.

Once on my iPad my first job was to use my PhotoSmith App to create a collection holding today’s Photographs, then I added location meta data and keyword’ed them. This App can then sync this information over to my master Lightroom Catalogue. I then used my new Raw processing software PhotoRaw. I loaded a few images and created a few full sized jpegs with a few tweaks.

The photograph of the garage was one I most interested in. I thought as a desaturated imaged leaving a little red in the imaged but removing the rest would work well. The kind of work I wanted to do really needed the HSL model of Adobe’s Lightroom but what can you do on an iPad?

With the garage image in PhotoRaw I had the import sharpening set to Auto, I have tested a few of the manual sharpening import options and there is even a setting for my Leica but Auto seems to produce the same settings as the Leica setting and seems to give the best results.

I gave the image a slight contrast boost, lifted the shadows and warmed and desaturated the image very slightly. I then saved it as a full sized jpeg and opened the image in Photoshop Touch. A quick selection of the coloured area to place it on its own layer, I could then turn the other layer into a Black & White image. Another layer containing the inside view enabled me to brighten that area. Once again it was saved and then opened in SnapSeed, where I warmed the image and added the frame. And so there you have it. An imaged processed from the Raw and the published on the web, all using my iPad. Even this post was written and published using it.

Packing the Gear for a Photography Trip

Travelling light can mean different things to different people.  While some would carry their Smart Phone others think a full Digital SLR kit with full set of fast glass from 24mm to 300mm f/2.8 is travelling light.

I’ll be heading out to remote areas of the British Isles and travelling light.  The subjects are Landscapes and Wildlife.

For the Landscapes i’ll be shooting film on Large Format, so i’ll be carrying my Ebony, a couple of lens, filters, light meter, dark cloth, loupe and of course a big heavy tripod.  All of this will be packed away into a small Crumpler shoulder bag.  Apart from the tripod which is essential the gear is relatively light.

For the wildlife then it will be 24-70mm /f2.8, 70-200mm f/2.8 and 300mm f/2.8, i’ll also be packing a TC17 which multiplies the effective focal length by x1.7.  Just in case i’ll also be packing a 12-24mm for Landscapes.  I am only packing eight sheets of film so once thats gone i’ll be using my DSLR’s.

Lastly for when I don’t want to carry a camera i’ll be carrying the little Leica M.  So thats my gear, travelling light for Landscape and Wildlife!


Wildlife Inspiration – BBC Spring Watch

Heron in Flight

Next week BBC Spring watch starts, one of my favourite BBC TV programs. I’ll be using the program for a little inspiration as I intend to do a lot of wildlife shooting that week. So lots of travel, carrying big heavy cameras, and early mornings.

Richard & Chris

PhotoRaw

Macbook Air -top
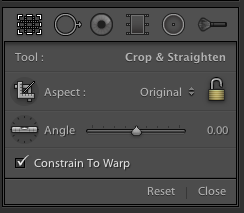
RAW processing has always been the preserve of the standard computer not the modern tablet which is viewed as a consumption device and not a device for actual work.  I have for a while wanted a RAW processor for the iPad but have always been disappointed with what is available, even Apple’s own iPhoto for the iPad can not handle RAW files.

iPad Mini

The best solution has been SnapSeed but now I have discovered PhotoRaw. SnapSeed, while it claims to be a RAW processor is not, it actually allows you to edit the imbedded JPeg used for imaging previewing, which is how most apps like Apple’s own iPhoto for the iPad works.  Now for many this is not an issue, and for many of todays top cameras one can configure the size and nature of the jpeg.

While many of these are not a bad solution, I wanted the real deal for when I am away on photography trips traveling light with the iPad.  I also wanted a solution that did not impact too much on my normal work flow.

When shooting in certain situations I shoot RAW + JPG with the jpeg set to Black & White. When I import these into Adobe Lightroom I thus get the full colour RAW plus a Black & White image. I can then quickly compare and decide if I want a colour or Black & White final image and edit the RAW accordingly.

The problem is working like this is not an option on the iPad as it only sees the imbedded jpg.  Thus I only get to work with the Black & White image.  So if I want to work on the iPad I either needed to change my work flow and camera settings or find a better iPad app.

With the release of Adobe Creative Cloud, Adobe demonstrated Lightroom running on an iPad and syncing back to your normal Lightroom database via the Cloud.

While this looks good, it’s still early days and there is yet no release date. Well now I have PhotoRaw and for once this does exactly what it states, real RAW processing.  The initial import can be slow but once that is complete and the RAW has been rendered one can then do basic editing, export a jpeg of the size, quality and crop you want and at that point take it into, the iPad’s iPhoto, Snapseed or Photoshop Touch (insert your favourite editing software here), and do the final editing.  Like many iPad apps its not a single solution but requires other apps, and once back home you will have to re-import the RAW and re-edit potentially.

I’ll give it good test on my next major photo trip and post more on what I thought.  Long term I think if Adobe can pull off Lightroom on the iPad and seamless syncing back to the desktop with the Creative Cloud, then for professional travel photographers that will be the solution to go for if you can put up with Adobe’s monthly fees.

Lightroom V5 Horizontal and Vertical Adjust

A few people have mentioned to me that they could not find the new Horizontal and Vertical adjustment tool in Lightroom V5.

Lightroom V5 crop tool

When I first heard of this tool I immediately went into the crop tool menu (short cut just press the ‘r’ key) and looked for the new tool there.  As you can see above no new tool there, though you can see the new circular gradient tool, to the left of the adjustment brush.

Screen Shot 2013-05-19 at 19.25.35The new tool has been put in the Lens correction section.  If you want to see it in use then check out the post last week. So if you want to have ago, download the beta and have a play.

Shooting People – What Camera?

After Landscapes, I shoot people the most.

  • Weddings with my SLR’s.
  • Model Portfolio’s also with my SLR’s.
  • Portraits with my SLR’s.

I would guess that 90% of other photographers would also reach for an SLR for these subjects.  I suspect the other 10% are professional studio photographs shooting with their Hasselblad’s, Leica S’s and other digital medium format cameras.

Office

Well with the interest of mirror less cameras expanding, I have shot a recent studio portfolio with my small Leica M, and taken a risk and done some commercial portraits with my Nikon One and the other day with the Leica M.

I have been surprised at how well they can perform, most of the issues have been down to the picture taker and not the equipment.  Its certainly given me food for thought.