Paper Profiles, Installers and Documentation

Lisa


Its been a busy week so far, buying paper and testing on my Epson 3880.  I have selected a set of images that are typical of the type of photography I do.  With these images I have been doing lots of printing on Tecco, Epson and Canson paper.

To get an optimum print you need a) a good icc profile which all three manufactures do have on their websites but also b) the correct printer driver settings for the paper type.

Epson is the easiest with it being an Epson printer, but its interesting to note that you cannot download just the profile, you have to download an installer that installs the icc profile and creates a folder with the documentation you need.  For some reason Epson have not signed the installer so if you are a Mac user, your Mac will refuse to install the untrusted application, its amazing that a company the size of Epson forgot to sign the installers.  They remembered to install the printer driver installer!

Security and Privacy

If you have not already you will need to pop into Security & Privacy and change your downloaded apps settings to Anywhere.  The installer will still fail if you just double click on it, you will have to command click and select open, that will then give you the option of running the installer.

All three of the paper manufactures have all the information you need to make quality prints but the information can be hidden on the website.  It was certainly easier to find on the Epson and Canson sites then on the Tecco.  Though I could not find the paper profile page on the Epson site, but my search engine did.

Paper Testing – Tecco

I am still in the early days of paper testing but already have some papers that I like.  As my local camera shop stocks Tecco Paper this has been the first paper I have tried.

So far I have tried the the following:

PUW285 Glossy Ultra White

So far I have printed some of my landscapes and some wedding portraits on this.  Its an incredibly sharp paper, the image quality is excellent, and its very bright and punchy with great DMax, with it being glossy it does suffer from reflection but its the kind of paper I feel that customers would like feeling and looking like a traditional glossy photo paper.


PPG250 Pearl-Gloss Super

This has been my favourite so far, its not as reflective as the glossy and makes lovely looking wedding portraits.
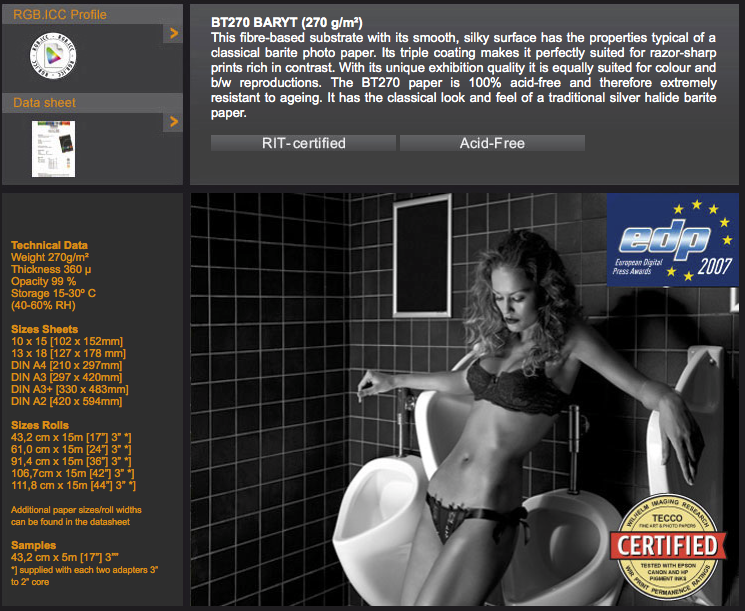
 

BT270 Baryt

This is a mat looking paper but uses the gloss ink for the higher DMax.  It feels heavy and has a subtle texture, it has produced some excellent black and white street shots, I also tried it with some high contrast black and white nudes and did a direct compare with the same image on the PUW285 Glossy Ultra White.  The  dynamic range of the glossy did result in better handling of the contrast of the image but the shine did not suit the surface.


BP210 Buttenpapier

This is a very interesting looking paper, it looks like hand made paper very much like traditional watercolour paper, I printed a black and white wedding portrait on it and it looked stunning, the feel of the paper makes the print very much an object to enjoy, not just the look but also the feel.

Its a paper to be used carefully, not all subjects suit this paper, its a genuine mat paper that needs mat black ink so the blacks can never be as intense as say the PUW285 Glossy.

I still have a few more Tecco papers to test and even if I decide other papers are better its been worthwhile to get up to speed with the finer details of fine art printing.

Now that I feel I am getting the hang of the printer, and of soft proofing the prints in Lightroom i’ll be picking up more trial packs paper and selecting nine or ten images that are representative of my style of work and seeing what paper works best.

I have so far ordered some Epson, Canson and Hahnemuhle paper.

I’ll also be picking up some Somerset at some point and possibly some Permajet.  I am not sure about Ilford as its unknown if they are going to continue to make paper.  I want to get down to two or three papers that will suit all my needs.
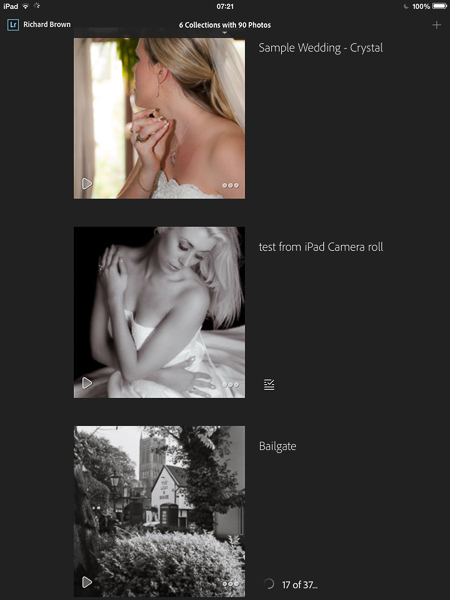
Paper and Ink

Tecco BT270The issue most people have with printers is the cost of ink, its not cheap and if all you are doing is printing documents from a spreadsheet or word processor then cheap third party inks are an option.

What about the high end photo printers, well thats a little different; while we all like to complain about the cost of ink it is how the company make their money.  The printers for what they are and what they do are really quite cheap now.

The higher end printers are a lot cheaper to run, while a consumer inkjet may have cartridges that contain as little as 18 ml of ink the high end start around 80 ml and go up to about 3/4 of a litre, they are far cheaper to run but still not cheap.

The question to ask yourself is why did you spend all that money buying an expensive high quality printer?  You wanted high quality prints.  That means good ink, good paper and lets not forget a fully colour managed workflow.  Whether you create your own icc profiles for the paper or you download the profiles the better paper manufactures have on there website.

The printer manufactures do spend millions developing their inks and papers and to get the best quality their ink is usually the best option.  There are a small number of specialist ink providers that offer specialist inks such as quad tone Black & White etc but these are very specialist items, in general your better off with the manufactures inks for best quality.

With paper I recommend going with companies that offer good support, you want documentation detailing what driver settings to use or what custom settings, e.g. what resolution to set, whether it supports Bidrectional printing or if its a slower to dry paper then single direction, colour density, paper tray and if you can get the information the platen gap, but that may have to be a guess.  If your using thick paper then you may need to change if from Standard to Wide.  The Epson 3880 has usefully named settings of Narrow, Standard, Wide, Wider and Widest!  Start with Standard and if you get a head strike which I did when testing the Tecco BP210 Buttenpapier, try Wide.

Epson Printer Installation

Epson Driver


Printer installation has not always been the easiest of things, though over the last few years things have gotten a lot better.

The first tip I can give you is generally bin the CD that comes with it (well file anyway).  Generally the drivers and utilities that come on the disk are a) out of date and b) will install a lot of rubbish on your system that you do not need.

Go to the printer manufactures website and get the latest business version of the driver.  Often the business version is just the driver ready to be installed on a print server which is what large companies with IT departments want.  The consumer version of the driver tends to come bundled with lots of ‘useful’ items such as a new customised search menu for Internet Explorer and other such handy goodies.

I downloaded the quick start guide from Epson’s website just in case the information now was a little different to what came with the printer.

Some printers have to be plugged into your computer before you switch them on, others have to complete a setup and you must not have your computer connected.  I know some insist the driver is installed before you connect to your computer and others that you connect your computer first and then when it asks for the driver you install it.  Its always worth reading the manual first.

With the Epson the first task after unpacking and removing what feels like hundreds of pieces of small blue tape from the printer is to power it up unconnected to your computer or network.

It will then automatically pop open the ink draw allowing you to install the ink.

The printer then takes about 5 to 10 minutes to prime, while it was doing this I installed the printer driver from Epson’s website.

With the printer primed and the driver installed it was time to connect.  This printer will be used by several computers so instead of connected it to my office computer I plugged it direct into my office switch via the ethernet port in the back of the printer.  This printer is not wireless but then if you need that you can always plug it into a Apple Airport like device.  It was then just a matter of going into Settings, Printer & Scanners, and clicking on the add printer button, the Epson appeared in the list, so I so selected it and that was it, a very painless installation.

Epson Ink statusMy first trial packs of paper have now arrived and I have started to test.  The results are excellent and I must say the Soft Proofing in Lightroom V5 with the paper profiles installed is very accurate at predicting the final results but i’ll discuss that in a latter blog post.


Epson Stylus Pro 3880

A printer that can print 17 inches wide has been on my wants list for quite a while now.  Having the flexibilty to print up to 17 inches wide in a desktop printer is very useful.  Unfortunately while the Epson Stylus Pro 3800 series is the smallest foot print wide format printer its still not exactly small so its been on the waiting list until we bought the new house.

Epson 3880


If you check on Epson’s UK website and also other online retailers the price differs by as much as £300.  At the Photography show last Monday I visited Epson’s stand and had  a look at the Pro 3880 and the smaller R3000.

The R3000 is A3 the Pro 3880 A2+ and there is not a big difference in the physical size.  Running costs is also a consideration as is build quality.  For a consumer printer the R3000 is one of Epson’s better high end printers.  The build quality is very good and as good as the professional services models.  The running costs are another thing; while the R3000 has fairly large economical cartridges for a consumer inkjet printer at 28ml, the Epson 3800 series has 80ml cartridges for not much more.

Epson were not selling printers at the show but they did give me a card to take to one of their dealers who was at the show selling printers.

The show price was about as cheap as I had seen it on the internet, the difference being this was a well known supplier not an unknown company.

When you factor in the retail costs of the ink the printer only cost £370, but then who pays Epson retail costs for ink cartridges, I have seen them range from £30-£48 for the same Epson branded cartridge.

They did not have any of the printers at the show but were willing to sell me one at the very good show price and three days latter the postman delivered my shiny new Epson to me.

I have ordered a number of trial packs of paper from various companies including Epson and have selected a series of images that represent my style of work to test with.

I have also ordered a full set of new cartridges, with the first set needing about 20% of their capacity to prime the lines and print head and with the extensive testing I intend to do, I am not expecting the first set of ink to last long.

The New Mac Pro – Photographers and Video/Film Editors Dream Machine

It has been a long wait but finally Apple released the new Mac Pro today.  Despite what people may tell you this is not a standard PC and no you cannot build one for $1000 despite what some people are claiming.

Macbook Air -top

The high speed standard 265 GB SSD and processor come to more then that and then there is the EEC memory and the twin workstation class video cards.  No this is a workstation and if you spec up a similar class of workstation from Dell or HP you will see that this is a well priced and well spec’ed machine.

Of course you may be asking will I be getting one.  Well when I get round to next upgrading my cameras I will definitely need more horse power in the photography processing department.

So I see my future desktop needs either being met with a high spec MacBook Pro/Air or a maxed out Mac Mini.  We will have to see what updates are planned.  A Mac Mini is a little low spec’ed in the graphics department but processor and memory is a good choice.  A high end MacBook Pro is close to the price of a low end Mac Pro so I will not say never.

Difficult choice, if only Apple would produce a Mac Mini with decent graphics.

RAW FIle with Extensive Editing

Still until then i’ll keep looking at the Mac Pro and dreaming.

Profiling Reminder

Profiling and Trending

Just a reminder, as my machine reminded me today, do regularly re-profile your displays.  Also remember to use your display for at least a few minutes to let it warm up before profiling as the colours can change in the first five or ten minutes until your monitor as fully warmed up.

I tend to re-profile every four weeks and my profiling software reminds me automatically when I need to get it done.

Why profile well check out one of my previous blogs https://brown-family.org.uk/profiles-screen/

Adobe Lightroom V5.3 available today

Adobe SiteI have had a busy day today working at home (loving the new monitor).  While I had the little Adobe reminder at the top of my screen it was not until tonight I checked to see what it was all about.  Well it turns out Adobe Lightroom V5.3 is out today.  Seems to be mainly new camera support so nothing new it actually interest me but good to see anyway.

Adobe Update

Editing – sorting the wheat from the chaff

If I am shooting fixed subjects like landscapes or buildings then is likely to only be a few shots of each scene. When shooting wildlife or people then I can end up with a thousand or more images to have to sort through.Lightroom editing

Well the first job is to get those image on to internal hard disk of my computer. I then import and copy them into the local Lightroom. The import also copied the files to an external disk. Once the majority of the editing is complete the Lightroom files get moved to external disk. By this time Apple’s time machine will also have a copy on its disk so I’ll havE several copies before the memory cards get wiped and I also clear down the local hard disk for the next set of images.

Something to remember with Adobe Lightroom V5 is that you can create something called a smart preview. This enables you to edit and image but not actually have the image with you, great for when your out and a about but wanting to get some work done on an old MacBook Air with only a small SSD inside.

So you now have a thousand or so images sat in Lightroom, how do you quickly find the great ones. Well there are several ways but I find it a lot easier if I use two monitors, one set to grid view and the other set to loupe.  This enables you to flick through the your images in grid view but evaluate them properly.

I also tend to group similar photographs together, you can then just pick a couple of good ones that ones that are very similar.

I also find its good to do an edit close to taking the photographs but also go back over your old work and look again at the ones you did not select.  To often you can chose photographs because of the amount of effort it took to capture and not based on the content.  Time can be a good equaliser.